Well hello there! Thanks so much for your excitement over our patio project. 😉 Today they finished installing and mortaring the fireplace. Tomorrow they start applying the stone. SO. EXCITED.
Because we are on an outdoor roll lately, I got some mojo up in here and tackled a project I’ve wanted to do for years.
I’ve always wanted a potting bench…you know, for all the plants I can’t keep alive. 😉 I wanted it for planting, but also for entertaining. A separate spot to put ice, drinks, food, whatever…sounded awesome.
(This is an updated post from years ago that I’m sharing again!)
So the potting bench was the perfect answer. And my Dad said he’d help me build one. He came over and I showed him my inspiration photo:

That would be the Abbott Island from Pottery Barn (of course) and it is pretty awesome, yes? The price is pretty awesome too – as in I’m pretty awesomely going to pass out, $ 1300.
Dad’s response? “We can totally do that.”
OK, I added the totally…he didn’t say that part. But he knew we could do it!
We talked about what type of wood I wanted to use. Initially I wanted cedar (because it would hold up best outside) but it is more expensive. Then Dad asked if I’m good about putting outdoor stuff away or covering it for the winter and my response it was a quick and definite NO.
So we went with cedar. 🙂

That’s my Dad way up there!
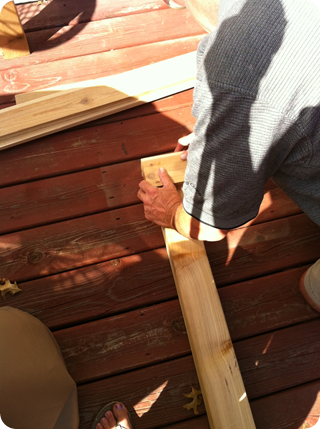
We got our supplies – two 4 x 4’s, a few 1 x 4’s and a bunch of 1 x 6’s. (If you have no idea what I’m talking about, I’ll show you those in a video below.)
We cut the 4 x 4’s to 36 inches, then stood them up to start our design:

We cut the 1 x 4’s to the length we needed (more on that in a bit), then attached them with screws to the top of each 4 x 4 and about a foot from the bottom of each as well (for the bottom shelf I wanted):
You can see here how the 1 x 4’s (the long horizontal boards) go off the edge of the legs a bit:

That’s because we created a “frame” around the whole thing, on top and bottom:

No mitered (angled) cuts – just simple, straight ones. The best kind. 😉
For added support, we put a couple more boards on the inside of each leg as well:


See how basic this is? It’s just boards screwed into boards. If you have tools, YOU can do this!
We added a couple more boards to the middle, again with screws – just for a bit more support:

More support never hurts.
Then we cut 1 x 6’s to the depth of the table (about 25 inches) and laid them across the bottom. Yet again, we just screwed them in. No glue, no nails. Just screws.
Easy peasy. I swear.
We cut more 1 x 6’s to fit the top, this way going with the length of the table. Our cuts were a bit off and we were getting a little tired and a lot hot, so we just installed them, then Dad cut down the edge with the jigsaw:


It worked like charm!
And then…we were done. Start to finish, it took us two hours. TWO HOURS. I can’t believe how fast it went! We were both in a groove, because this whole thing went like buttah. Not one issue — we couldn’t believe it.
I found some basic, low profile hooks and attached those to the sides:

I have no idea what I’ll hang on them but they look FAB!
I love it so much!!:

I did a quick video to show you the details up close, just in case this isn’t clear. It really is a basic as it looks though – it came together easily.
Here’s the video and I cannot believe I put my face on here, seriously. I had been sweating profusely for two hours straight. And I say “um,” “basic,” and “just” an awful lot. But this should help you see more of how it was built:
You can see on the video that the bench is placed over our fireplace vent right now but the fireplace is not on and the pilot light is not lit. It will be moved over. Do not put anything near your vent!
So here’s the PB version:

And ours:

The PB version is 50 inches wide, 28 deep and 36 high. Mine is 60 inches wide, 28 deep and 37 high. I didn’t even plan on the dimensions matching up so much, it just worked out that way. 🙂
The cedar wood cost about $ 130 – not a super cheap project, but considering it’s $ 1000 cheaper than my inspiration, I’m thrilled. And mine is even wider than theirs! By the way — this could easily work as an island in a kitchen!
I’m trying to decide if I’m going to add some wheels – I found these super cool casters:

I just don’t know if they’re chunky enough. I may put them on just to see – it won’t hurt!
Now…the BIG question! What to do now? I had planned all along to stain or paint it. When I mentioned paint to my Dad I think he may have had a small conniption. 😉 He said the cedar will age beautifully over time and he would just leave it.
And when I hosed everything off, it was even more gorgeous – the water brought out all the beauty in the wood:

So now I’m leaning toward just a coat of poly or Tung oil, to bring out the tones of the wood.
What would you do? Paint it? Stain it? Leave it as is? I know what my Dad would do. 😉 Once I figure that out, I’m going to start using it and I cannot wait!
Speaking of my Dad – HE IS AWESOME!! It thrills me to no end that we can DIY together like this. I love that we continue to make father/daughter memories, even as I get older. And he reads this blog, every day. 🙂 Thanks Dad, I love you!
Go see how I finally finished this pretty potting bench here!:


