I finally finished up one of the last items on my list for the kitchen renovation. I called this room done last fall, but I did have a couple little things left on my list. I was happy to get this upper and lower cabinet lighting knocked off! (Edited to add — this is the kitchen from our old home, but the tutorial is up-to-date!)
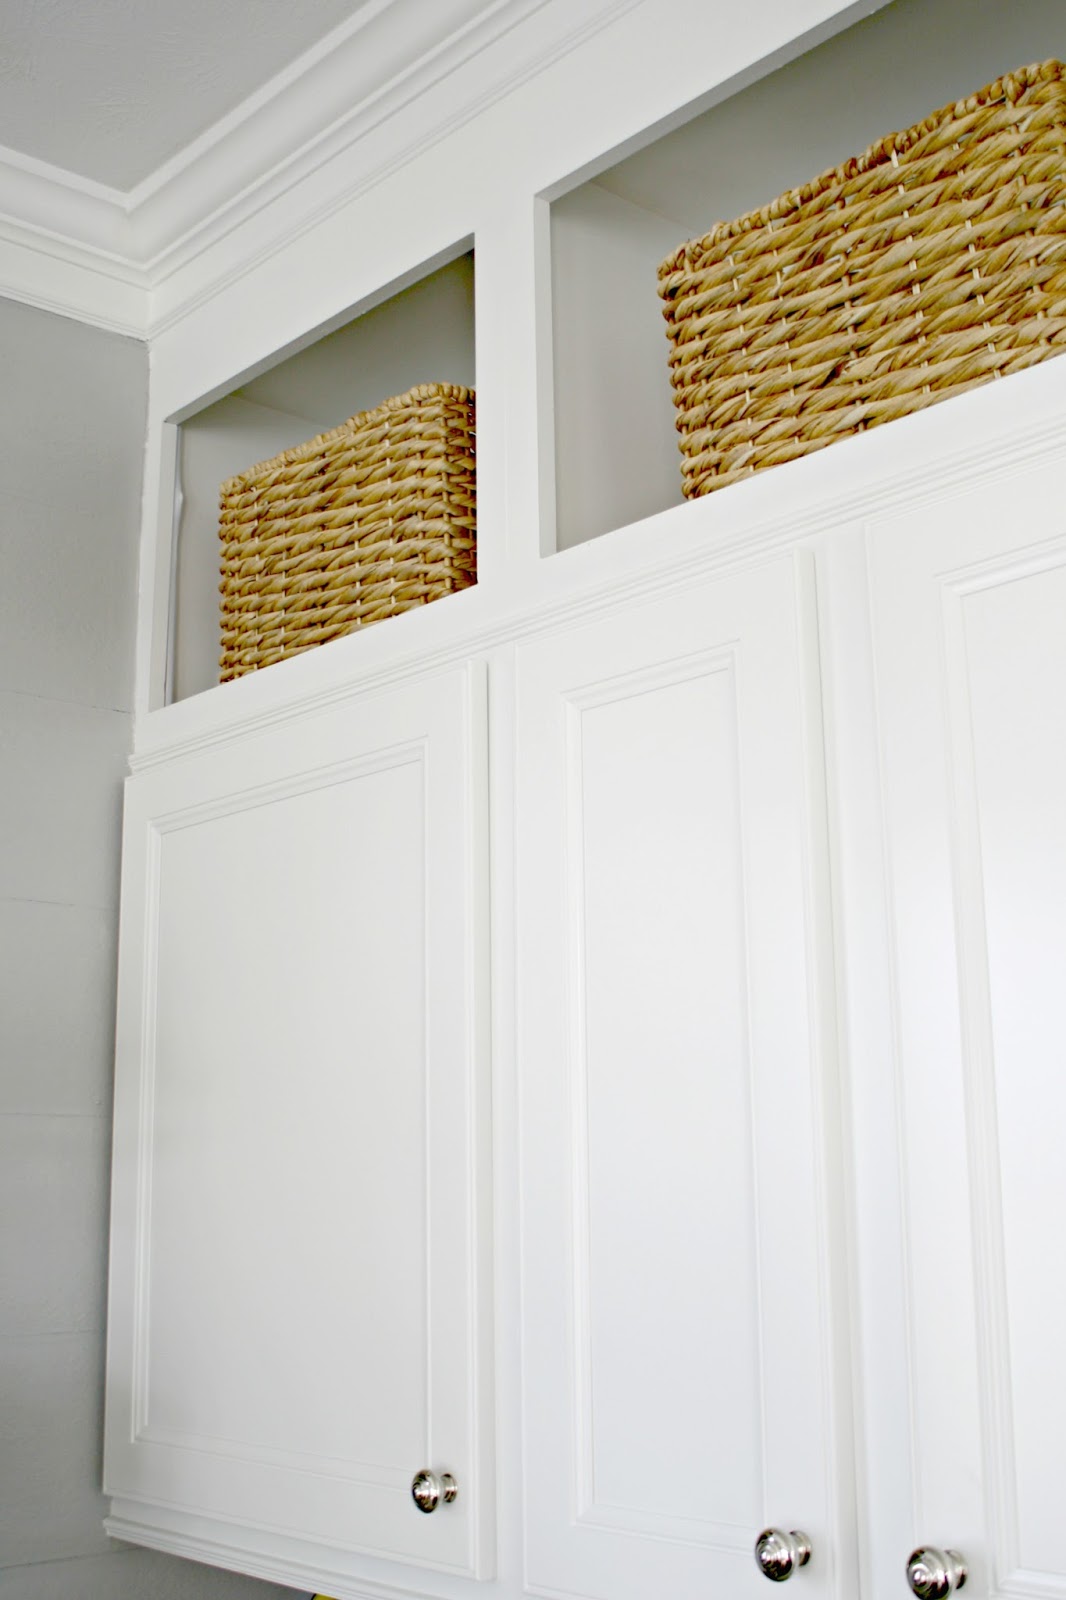
I installed the under cabinet lighting back then but never showed it to you because I wanted to get the upper cabinets done too. It was great having them down below but the upper lights are the real showstoppers.
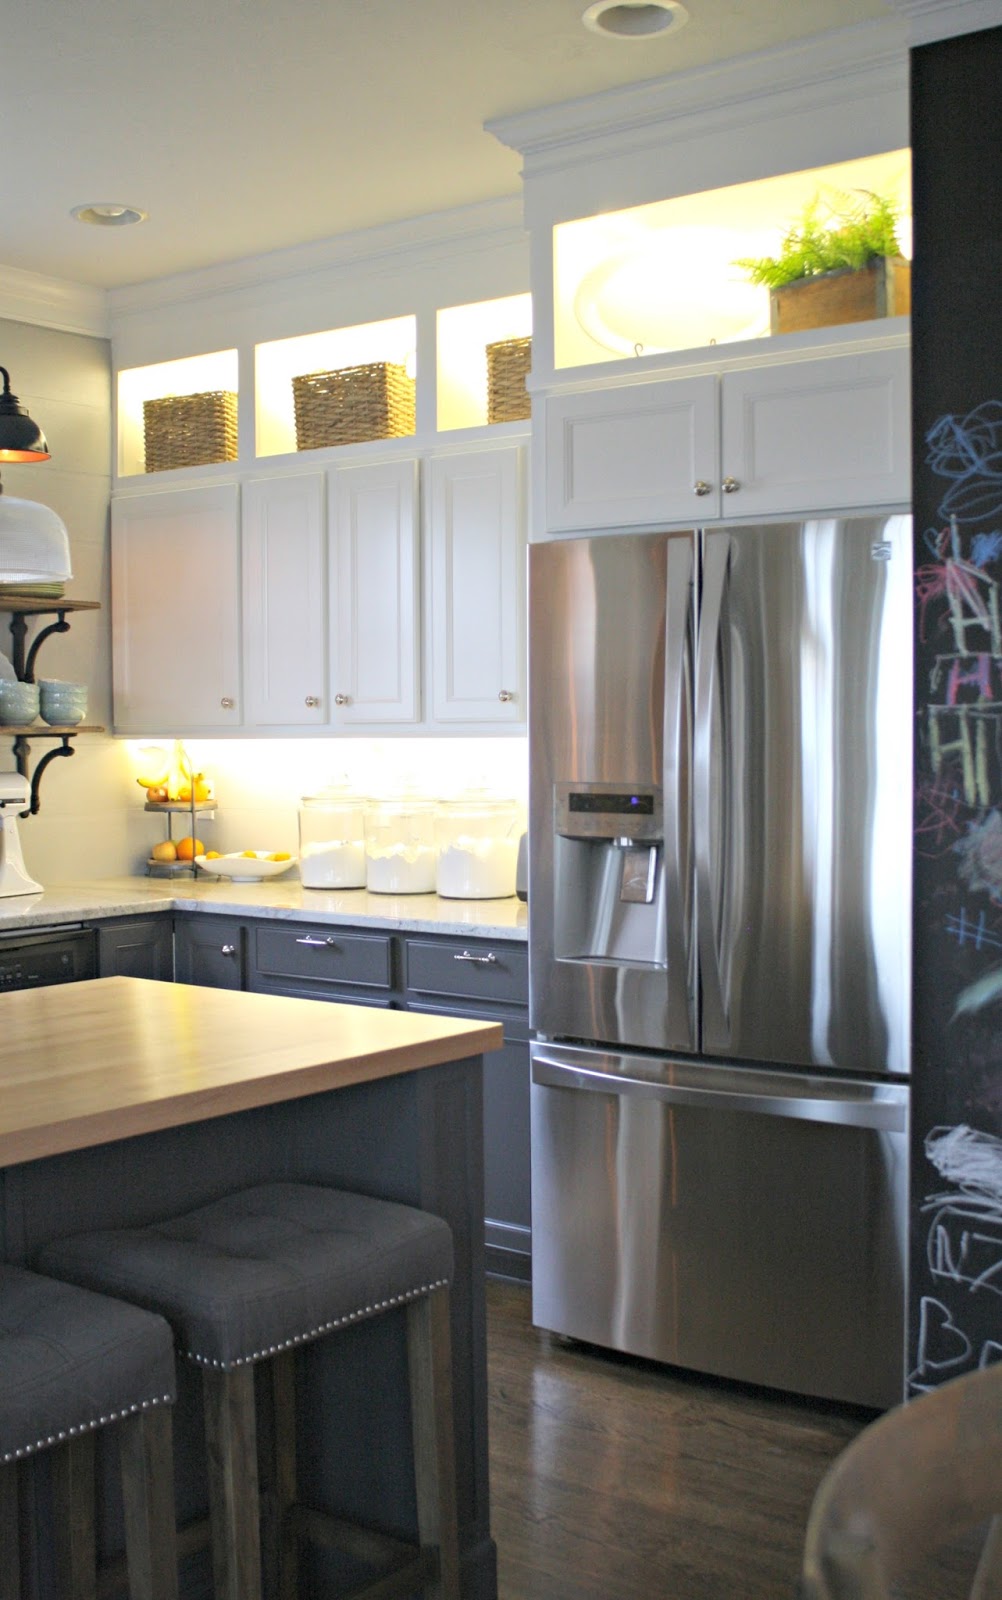
I LOVE how they look all lit up!:

This post may contain affiliate links for your convenience.
See my policies and disclosure page for more information.
I’m so thrilled with it! If you’d like to see how I’ve done this in the past, check out this post. If you don’t have an outlet and switch dedicated to these lights that tutorial is one you’ll want to use.
I used timers back then and they worked great — and you could easily use timers on these too. The only difference between then and now is that I had an outlet run up high in the wall this time and I used different lights. This version works great if you only have one run of cabinets you are working with. The one I did years ago will work better if you have a bunch of cabinets you want to light up.
So…check out both posts to see what will work best for you! There are pros and cons to each type of lighting — last time I used rope lighting and numerous incandescent light strips and I really like the warm light those let off. They are bulky compared to these though, so this is a much less intrusive design. I’ll go into to more detail on the pros and cons later in the post too.
This is one of those projects that looks intimidating but is SO not. I promise you, you can do this! I used this tutorial as my guide so you can check that out too.
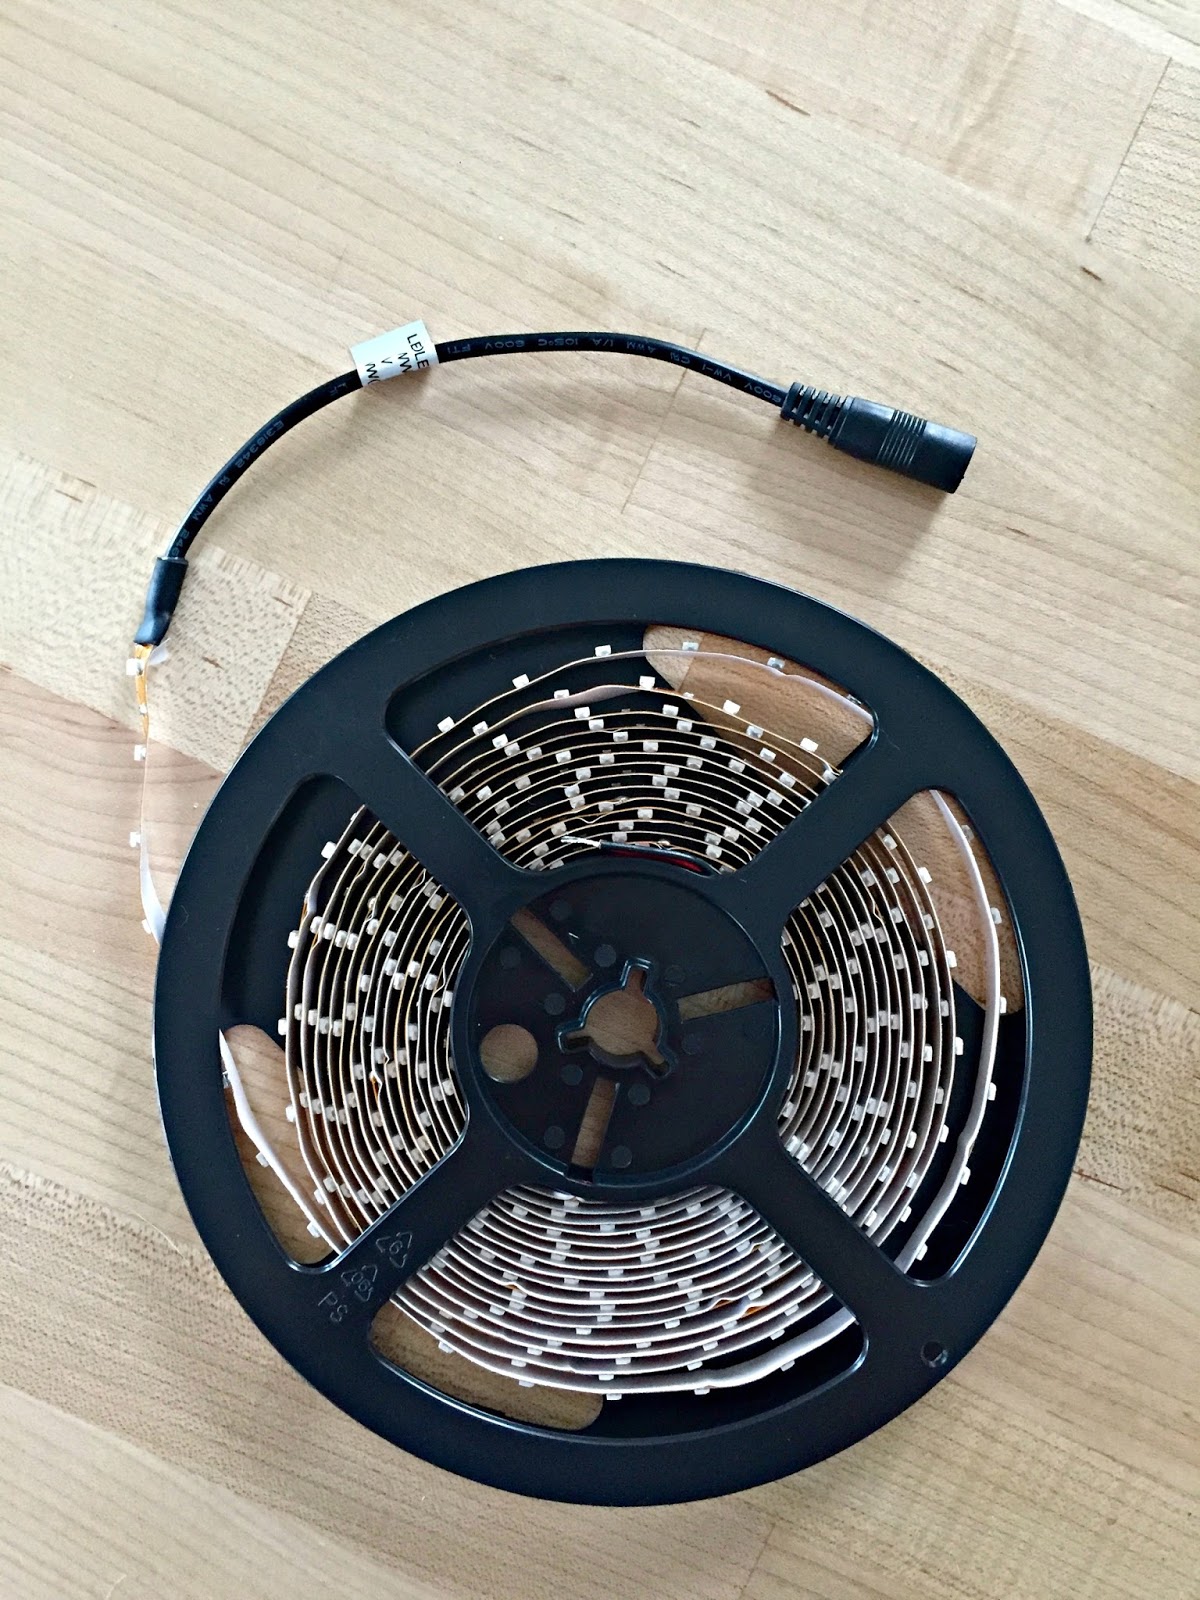
The materials
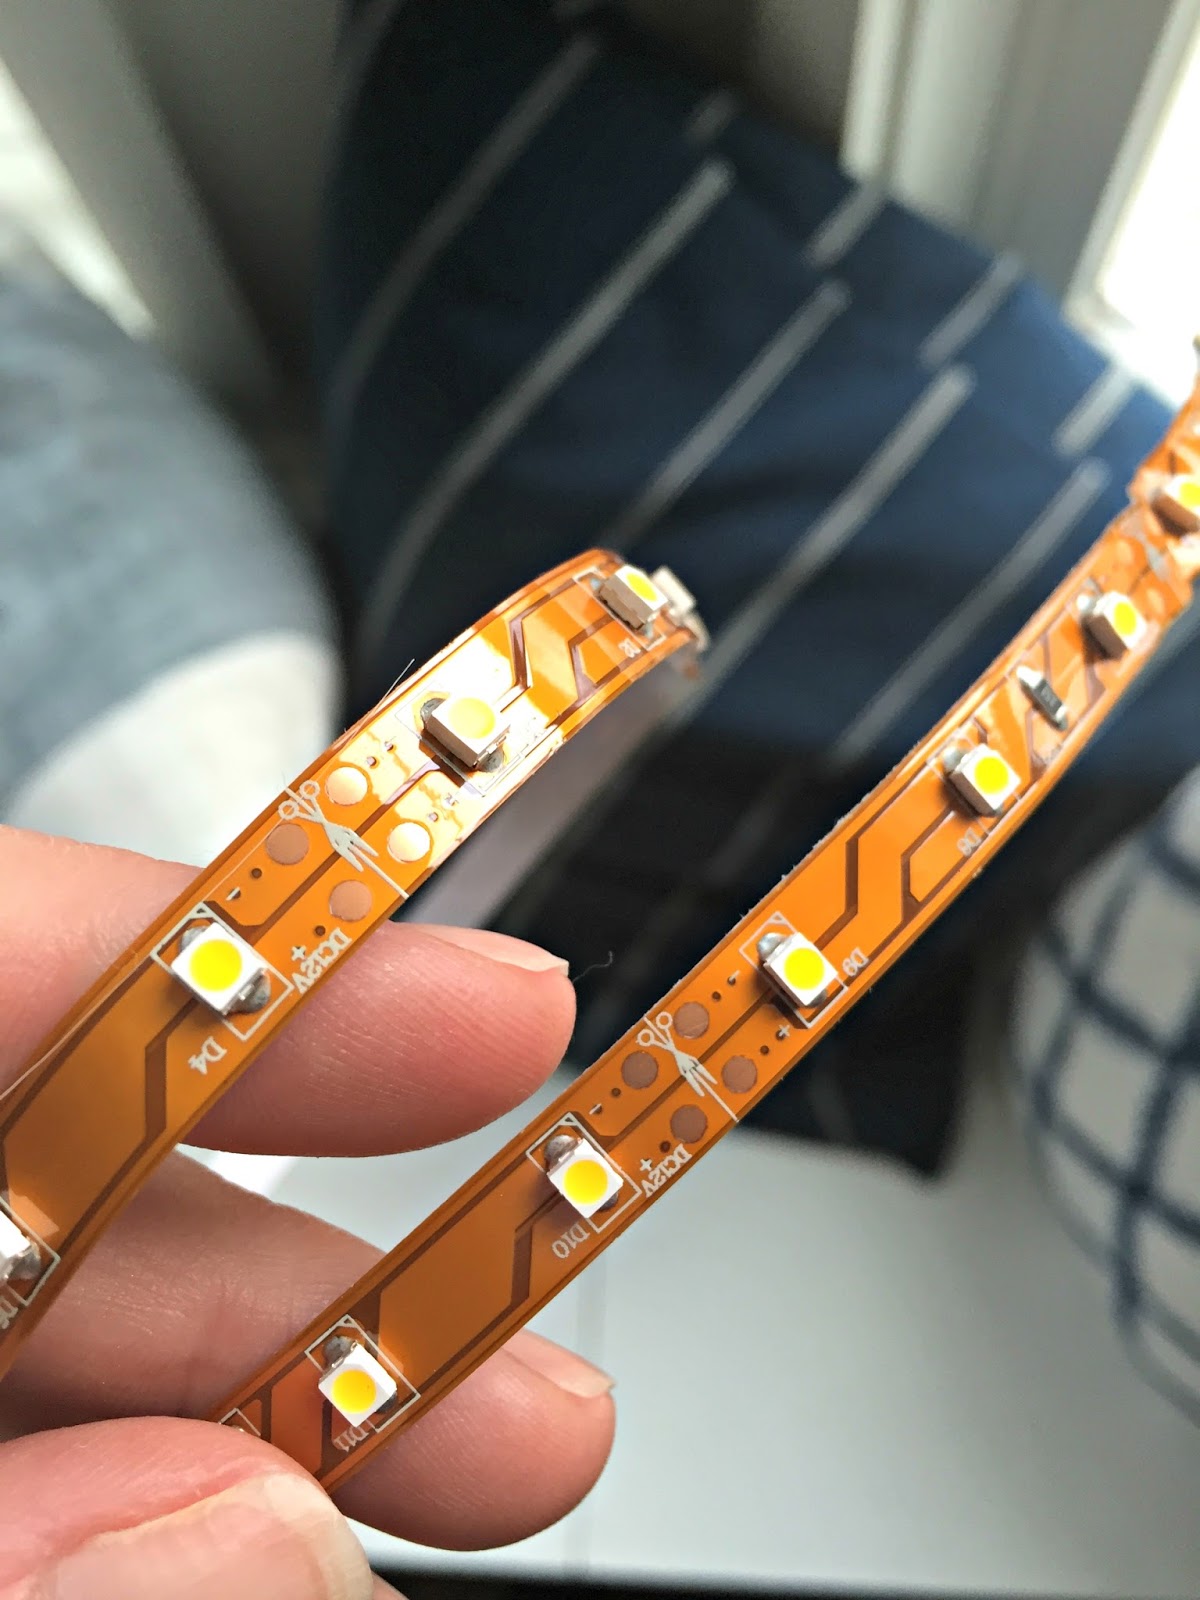
The lights I used are easier to use than rope lighting because they are so tiny and because they come with a sticky back — that’s a big help. These are the lights I used:
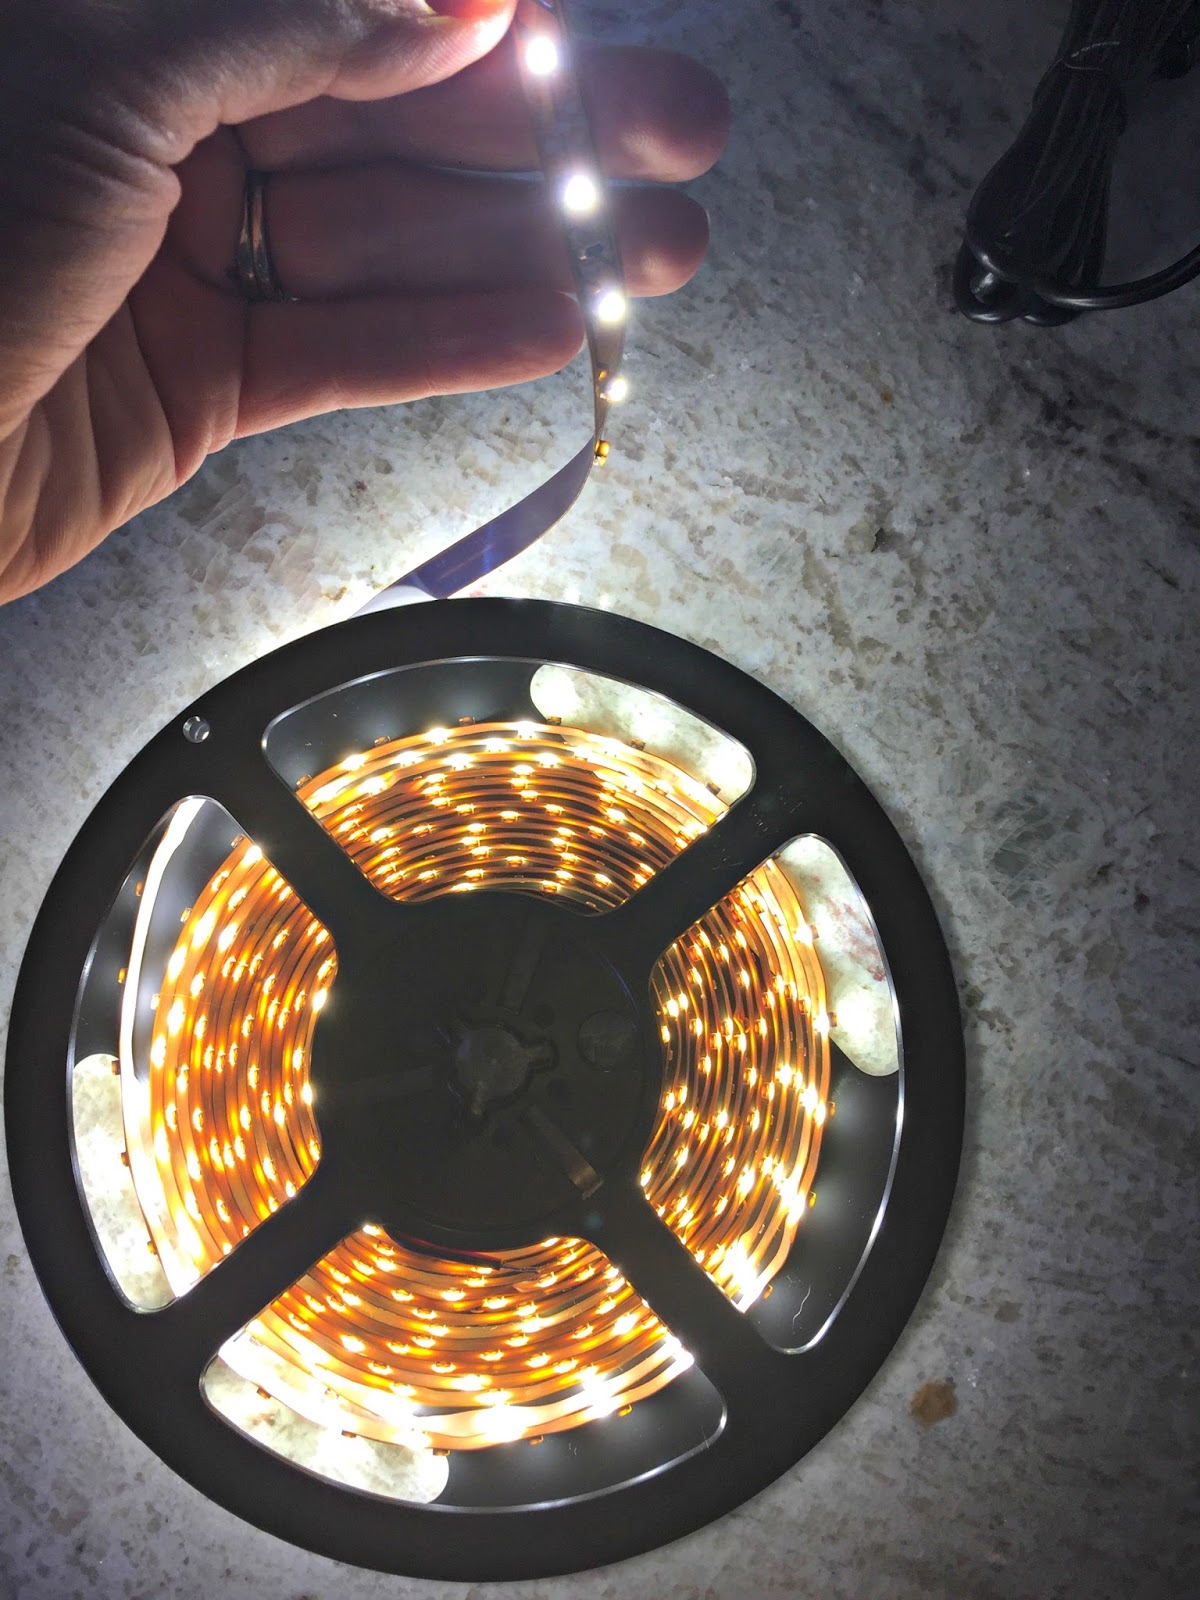
First thing about these — they say warm light, but I don’t consider them warm, at least not when compared to regular incandescent lights. They look much warmer during the day than at night. I absolutely love the look, but just know that “warm” is a bit of a stretch. 🙂
Here they are lit up:
If you purchase these, you will need this power adapter for each run — I bought two, one for the under cabinet lighting and one for the uppers:

I had an outlet installed (connected to a switch) before we finished up the drywall in the kitchen. It’s on a wall at the end of the upper cabinets, and I had it placed low so it’s hard to see:

I used cord hiders to hide all the cords on this project — I use these all over my house:

I hate cords — it’s my thing. I think they can ruin a beautiful project quick so I always have them on hand. You can see the ways I hide cords in this post!
The installation
For the lower lights I ran the cord and cover up inside the cabinet on the left inside. For the uppers I ran the cover down the left side of the cabinet, behind the trim:
You only see it if you look for it. There’s a slight bump where the adapter and lights connect but other than that it’s seamless. If someone ever notices it you know what I give them — a cookie. 🙂
The strips have a sticky back — so peel the paper off and just stick it to your surface. Mine have stuck fine to painted and unfinished trim. For the lower cabinets I just ran the lights along the back of the DIY light rails I installed:
For the uppers I ran it along the back of the header. I drilled holes between each set of cabinets and threaded it through:

When you get to the end of where you need the lights, cut them. Make sure to do this where the little scissor marks are:
Now, you can cut this, then attach it to 12 volt wire with a soldering iron and then continue them. The manufacturer does not recommend putting two whole 16 foot strips together. So if you have a spot where you want the lights, then a break, then you want them again, this is your solution, but only using one 16-foot length. (The tutorial I linked above shows you how to do that so be sure to check it out if you need to do that.)
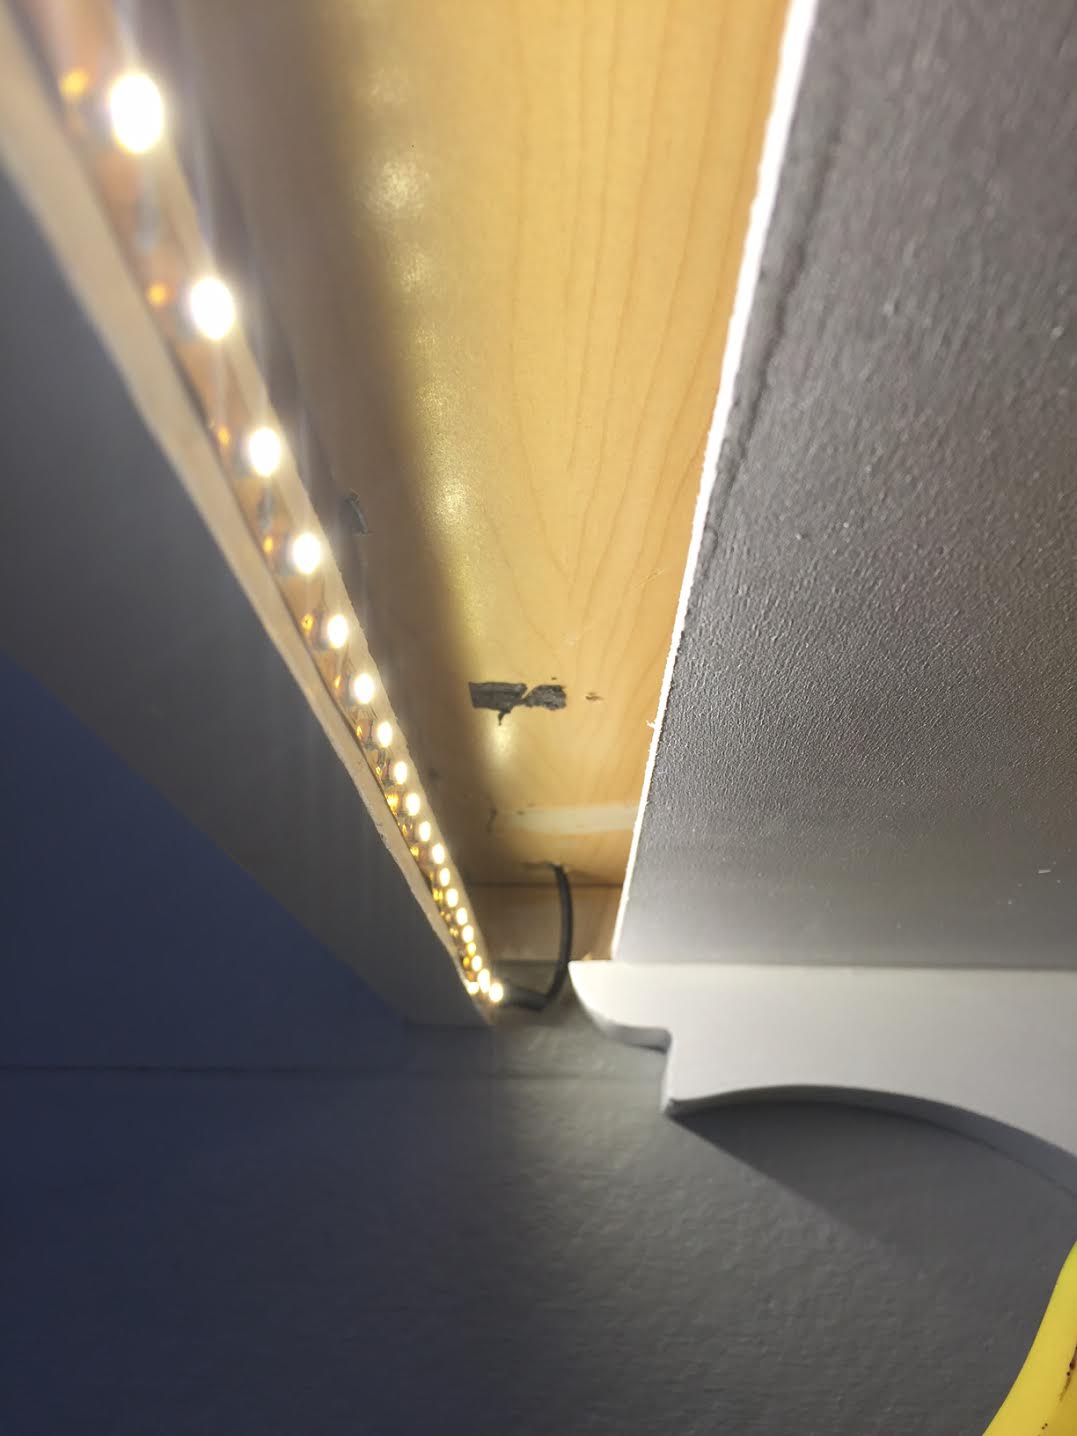
I actually bought the iron because I thought I’d have a break in the cabinet over our fridge. I pulled the light through in the back of the cabinet (where it met up with the other cabinets that are further back) and needed to get that light to the front of that cabinet (to attach the lights to the back of the header). To do so meant running it along the sides, which you would see.
Instead of trying to use wire and the iron, I came up with a simpler solution. I went ahead and ran the lights along the sides of that cabinet, and then picked up some tiny crown molding (found mine at Home Depot):

Then I installed it a little low so you can see the glow of the lights coming out of the top:
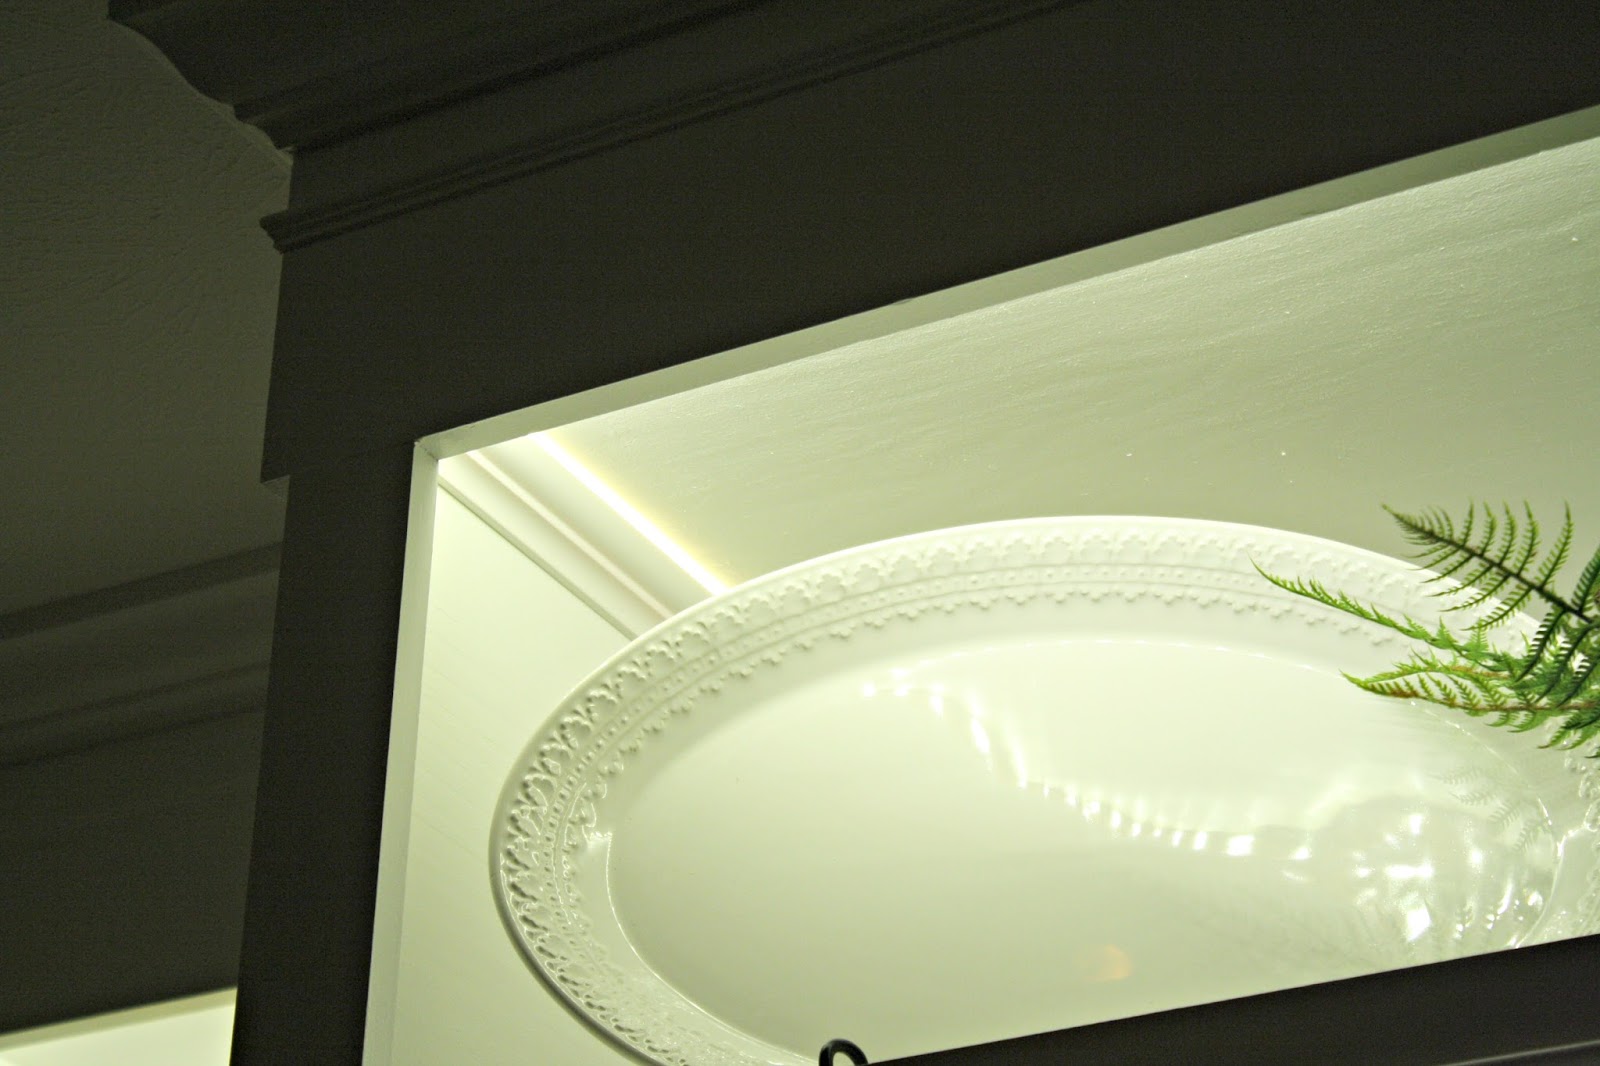
Remember these are LED lights so they stay very cool to the touch. This is a trick you can use with your regular crown molding too! It’s a cool look, especially in a basement or theater room. It offers low ambient light in a room that you want mostly dark. Just make sure not to have your crown go all the way to the ceiling.
If I had connected wire I would have had to hide that running along the sides anyway, so this was an easier solution.
The result
It was hard to get a good photo without the lights blowing out — my best pic was actually taken with my cell phone:
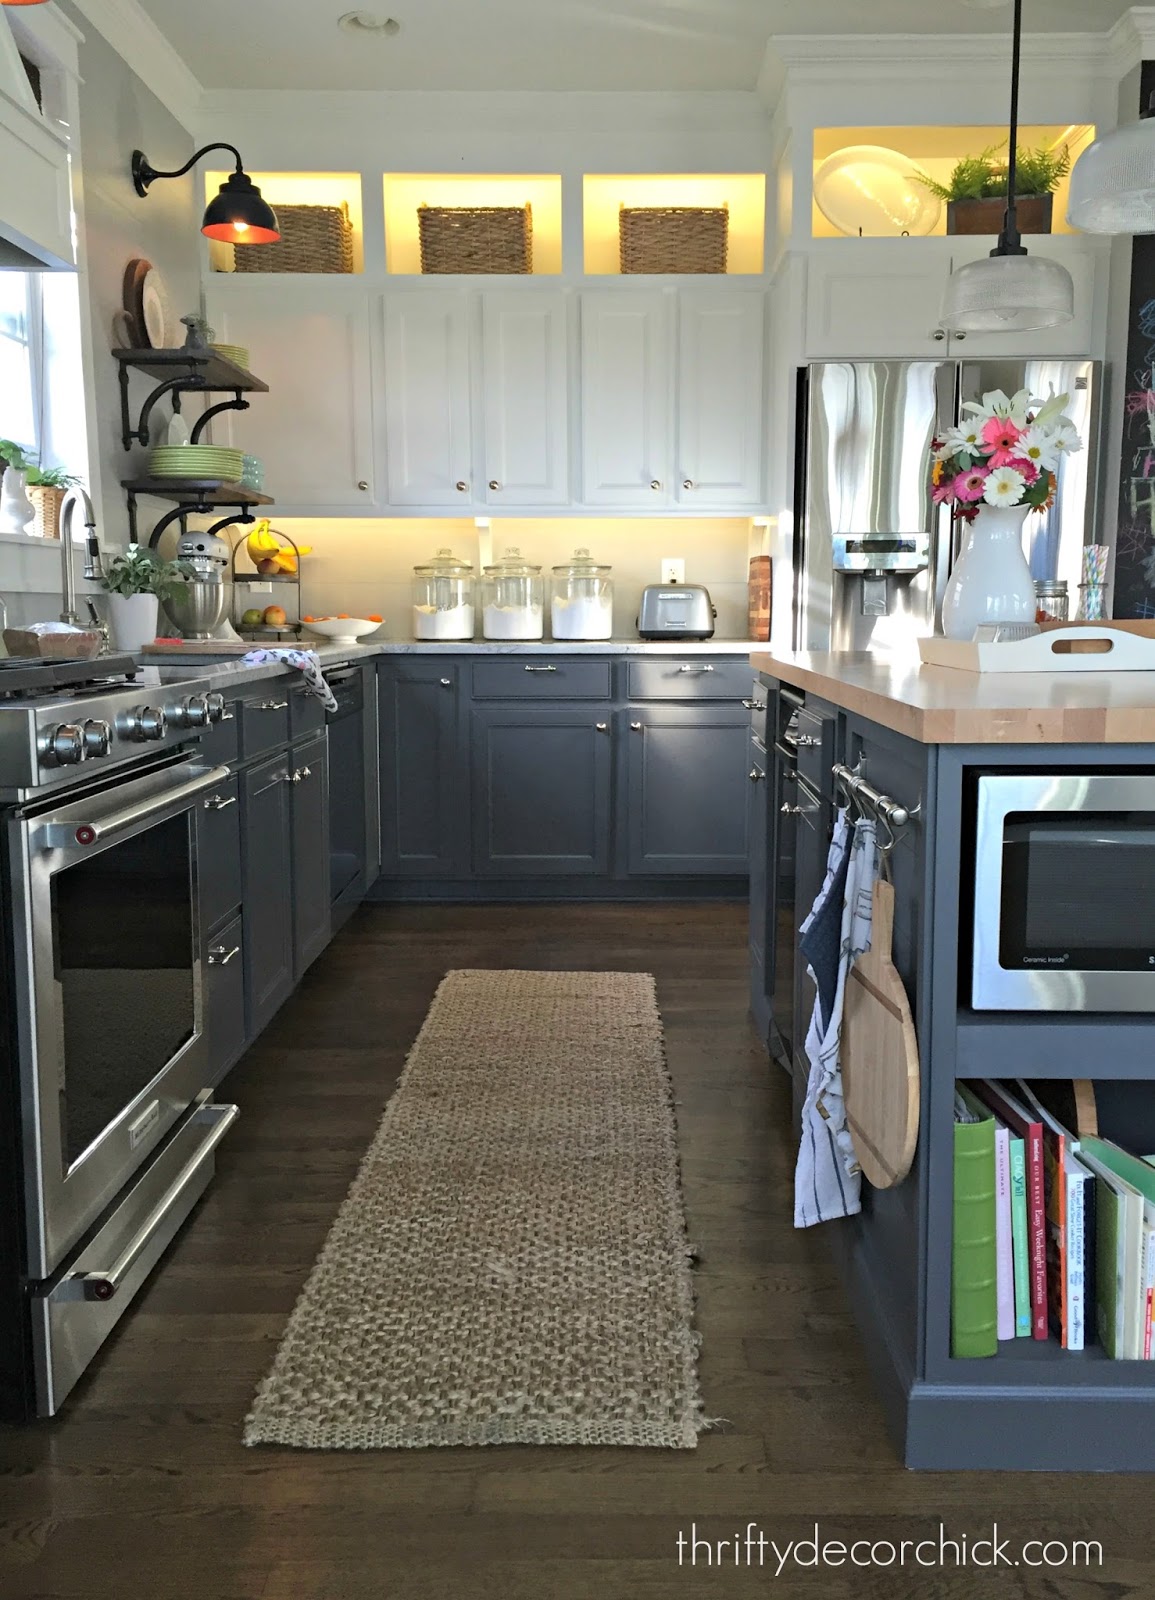
This really shows the true look of them when they are on. This was during the day and they look warmer here. They are LOVELY! I love the low light at night.
As I mentioned before, there are two ways to do cabinet lighting. The light strips and rope lights I shared years ago here have a warmer glow, but it’s a lot harder to find the incandescent strips now. And they do burn out eventually. The LED lights will go forever, are cool to the touch and are easier to maneuver.
These are easier to use on one bank of cabinets like we have here. They’d also work great in a bookcase or built ins. Once you’ve had under cabinet lights it’s hard to go without them!
It really is great for task lighting in a kitchen at night, even with all of the overhead lighting on:
There is one final change to make — I had the sconces and these lights run on the same switch and I’ve changed my mind on that. I’d rather have them operate independently. Thankfully there’s an easy solution for that so I’ll show you that soon! (Edited to add — you can see the simple way to do that here!)
Also, these are not dimmable with a standard dimmer, but you can get this one that you wire to them. It’s manual though, so it needs to be in a spot where you can reach it. It would be ideal for under the cabinets — you could attach it underneath and adjust the light.
I hope all of this makes sense! If you have any questions about this process please let me know. These are a really affordable and energy efficient way to add accent lighting to your kitchen! Here’s an image to pin for later if you are interested:

Here are a couple more of my favorite DIY lighting projects!


See more of our home here. To shop items in our home, click here! Never miss a post by signing up to get posts via email.


