I’m nearing the end of my latest room makeover and I’m SO happy with how it looks! Just one more big project and a few small ones to complete before the final reveal! You can read about all of the big changes to our mud/laundry room storage situation here.
Here’s a reminder of what we started with on this wall:
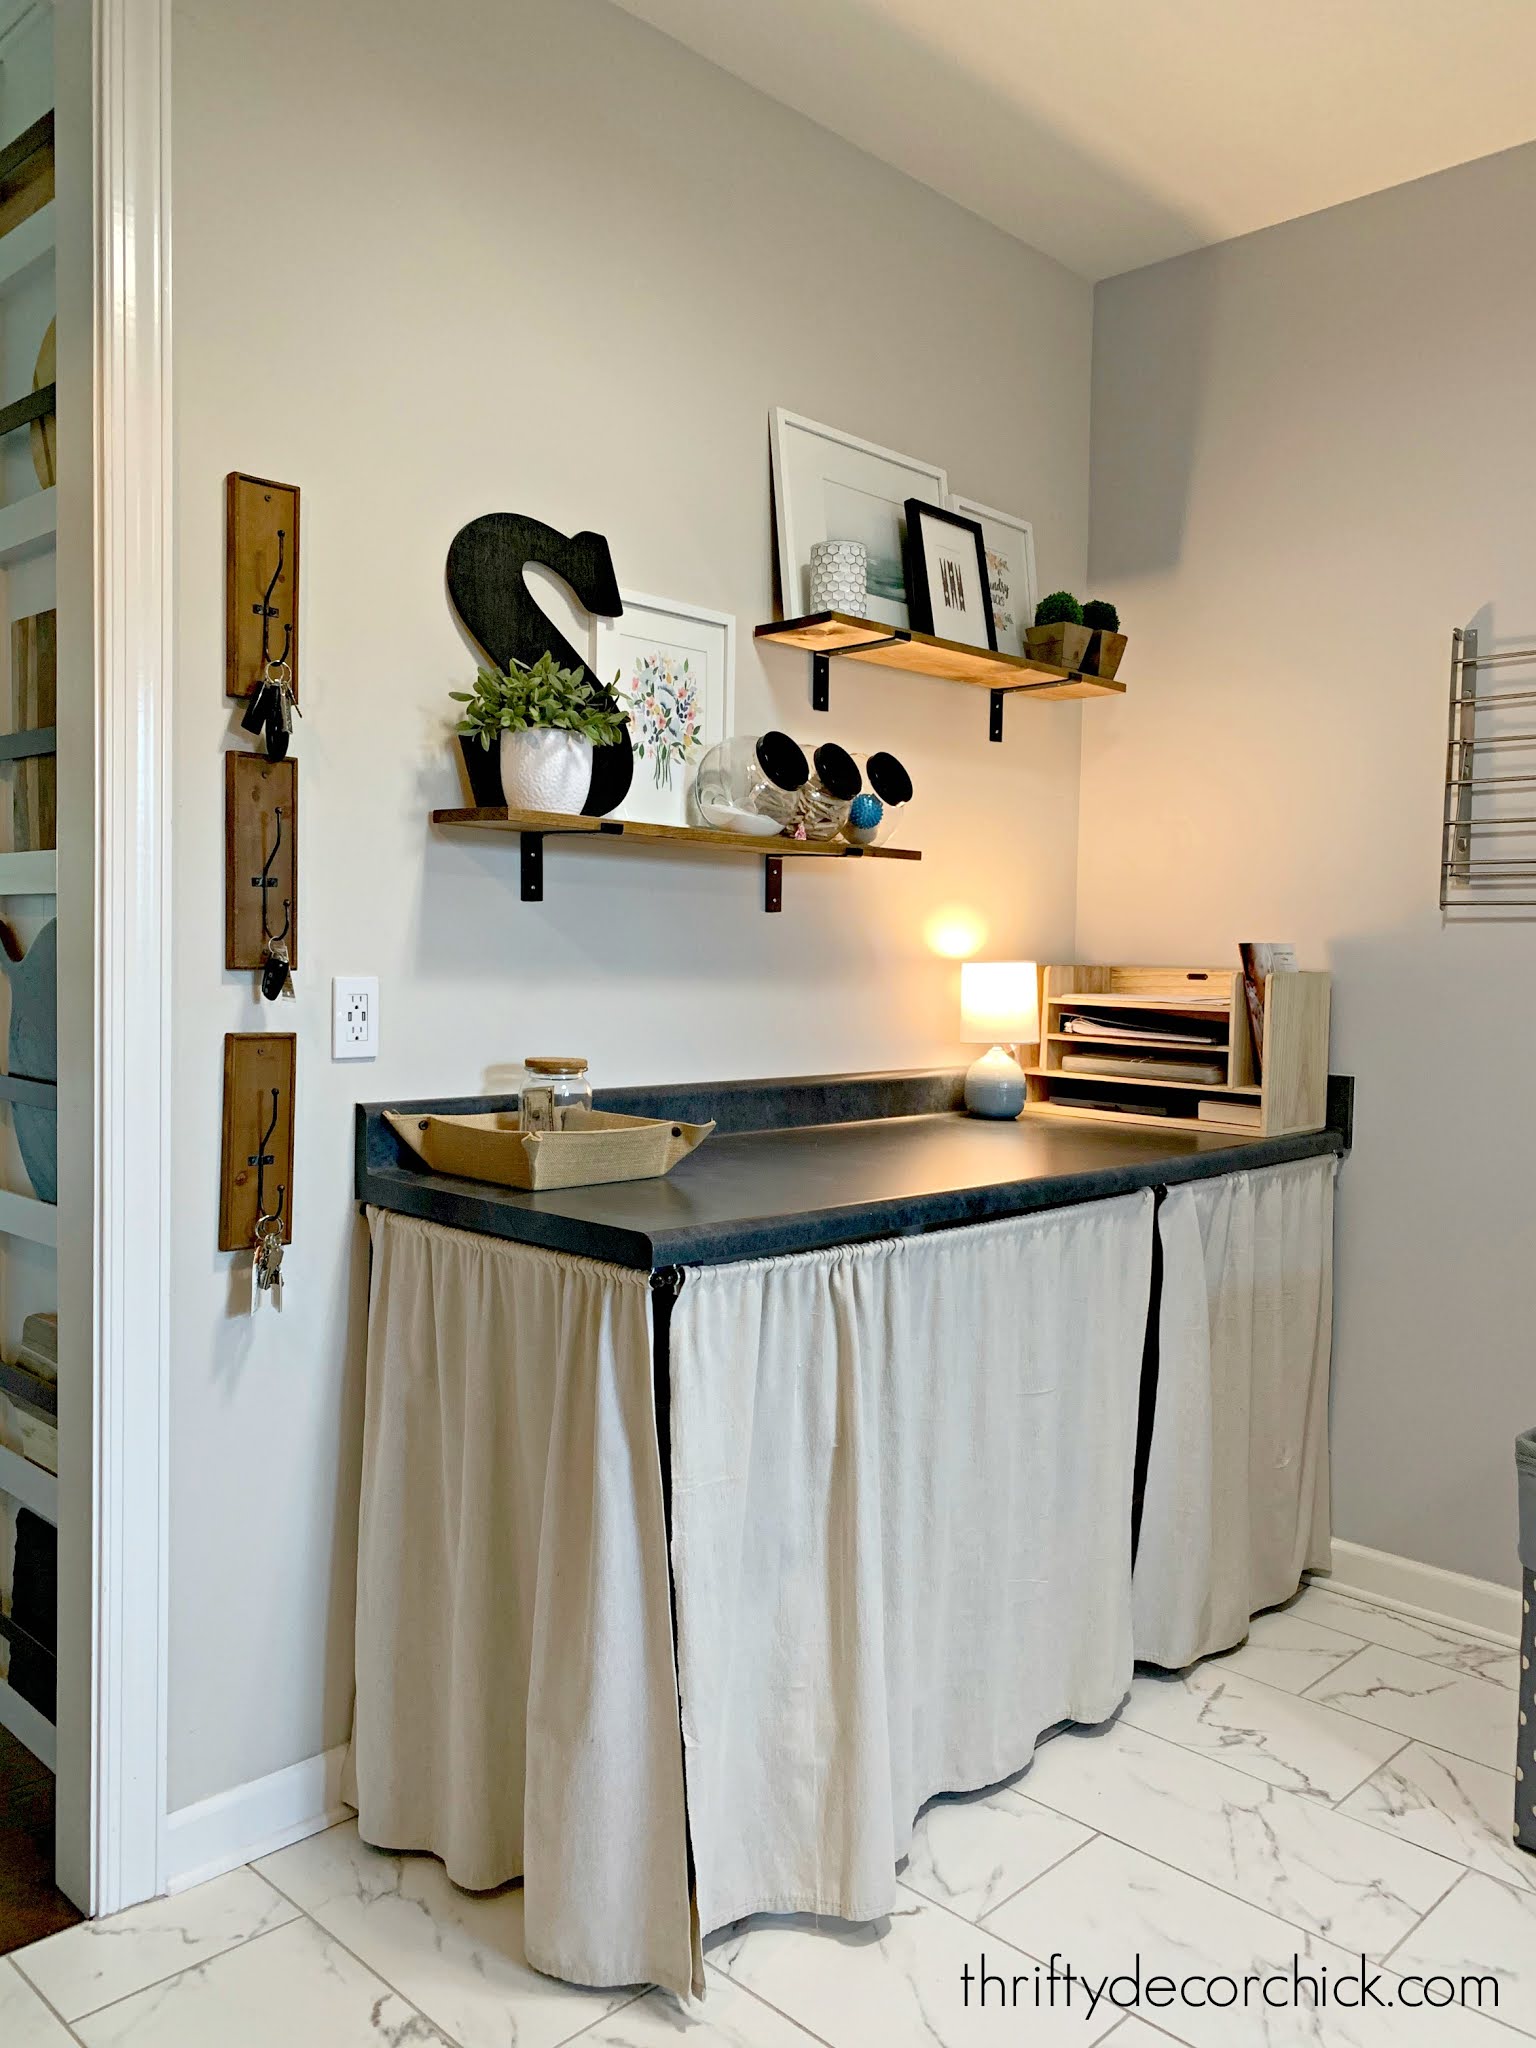
We hid the kitty litter underneath and the top was supposed to be a folding table. Haha! There was rarely room to fold anything. As much as I have decluttered and organized in our home, we still needed a spot for many items around the house. A lot of them ended up on this counter!
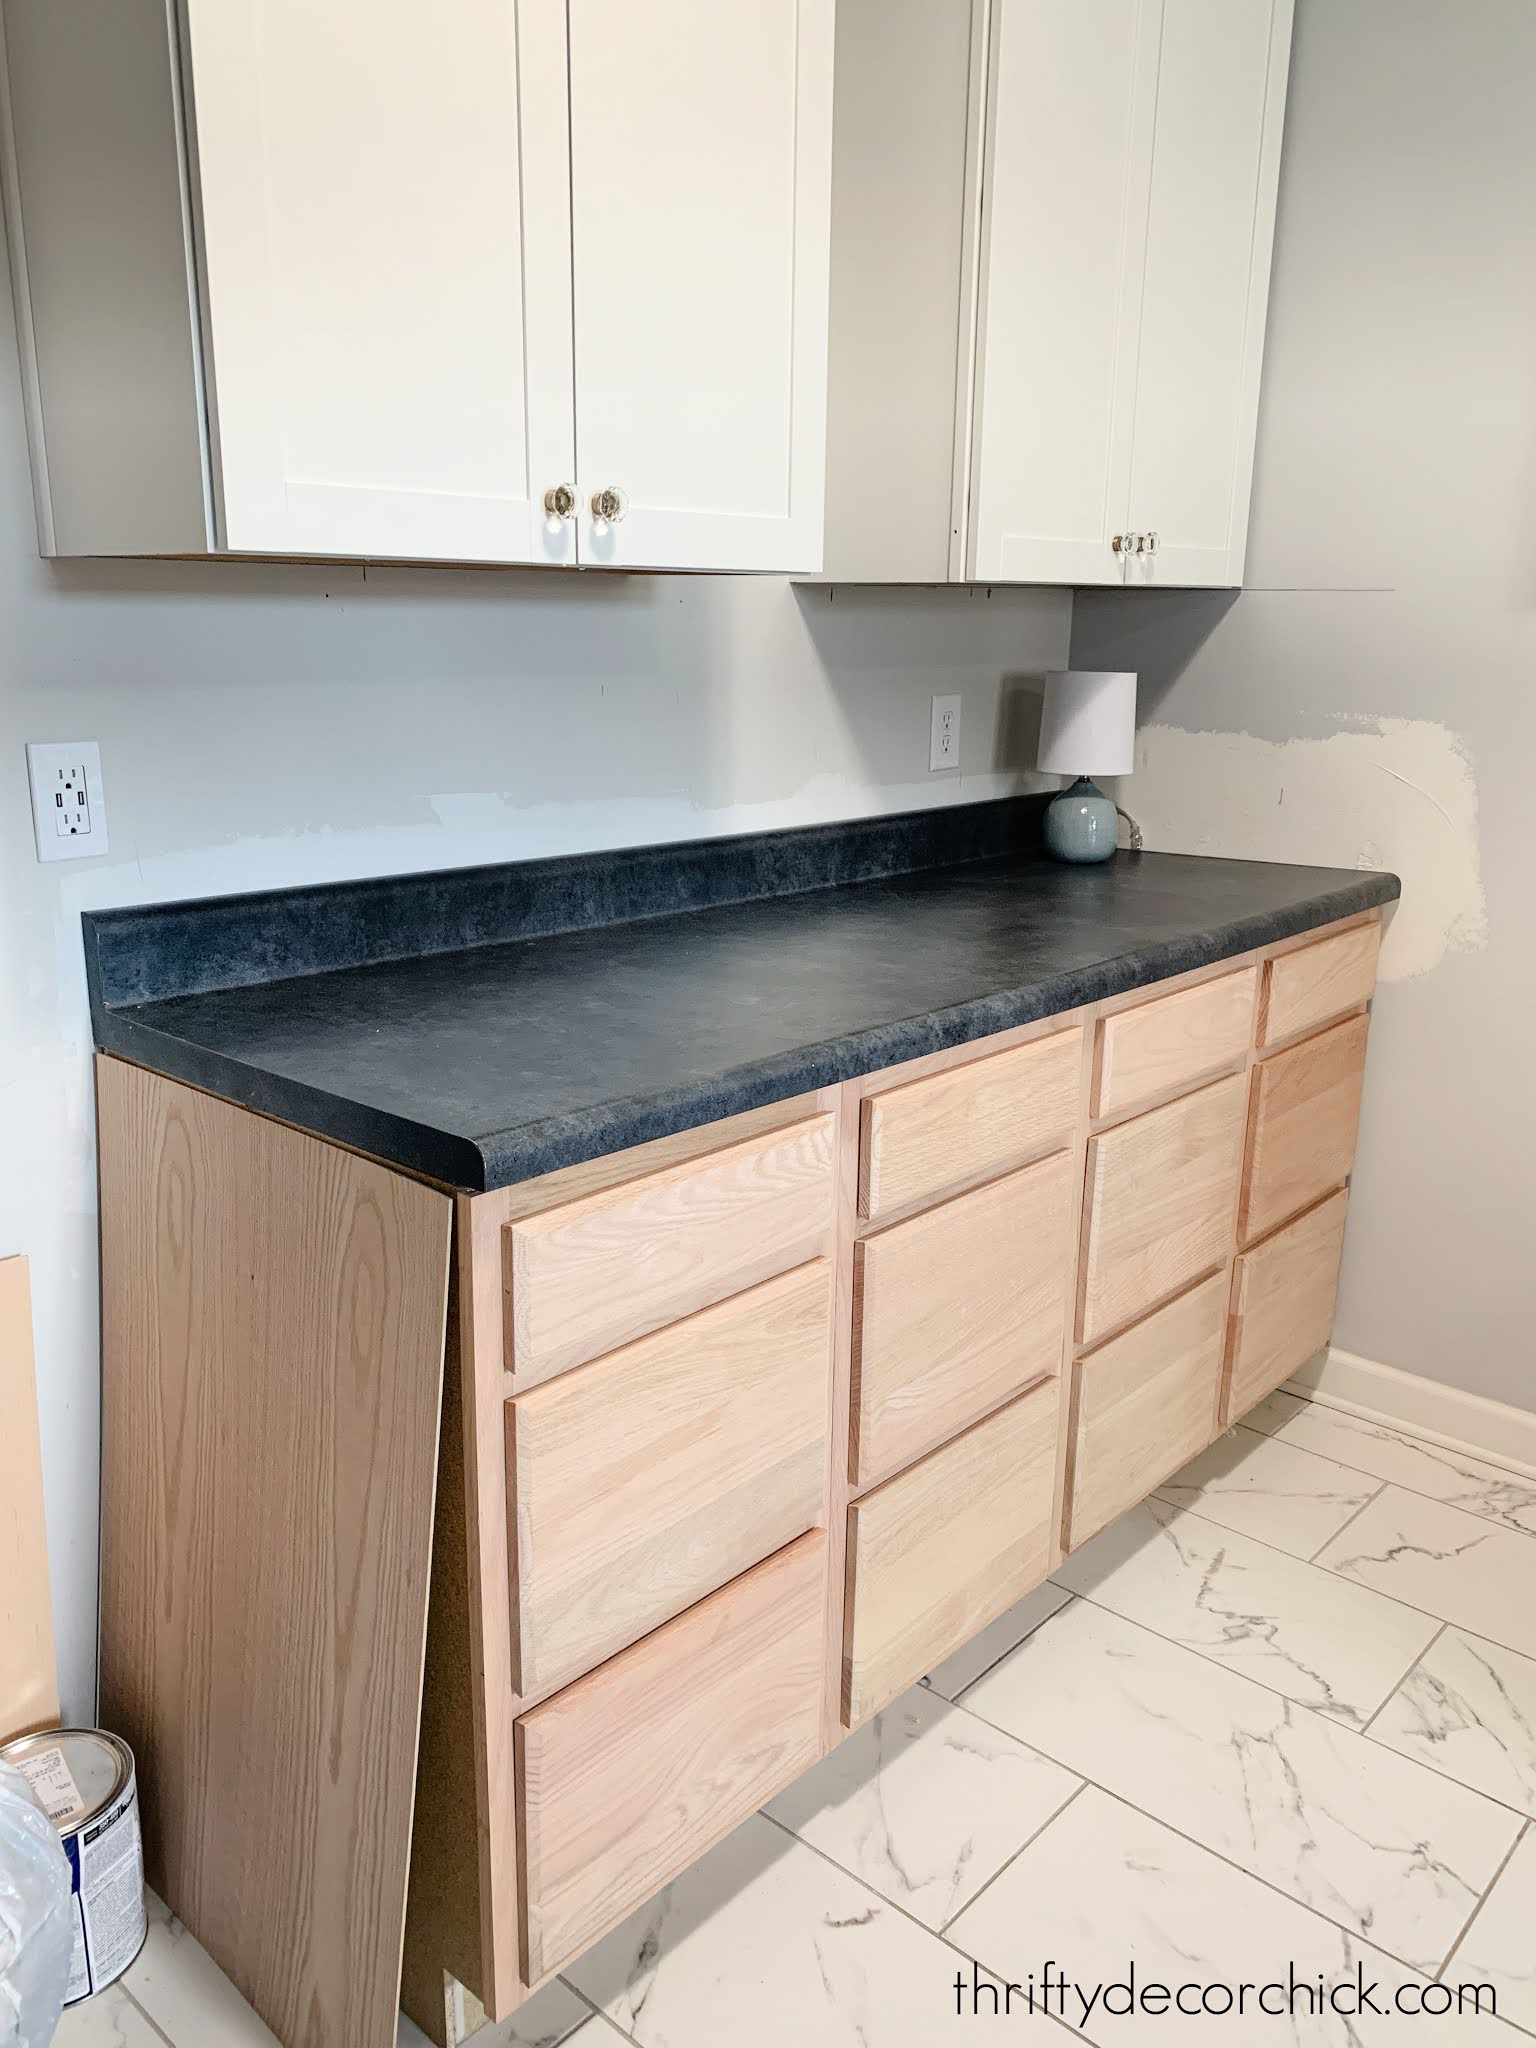
Then we had some upper cabinets moved from over the washer and dryer to this spot, and I installed four inexpensive drawer units on the bottom:

They are the basic unfinished cabinets you can find at any large hardware store.
I later added this gorgeous wood countertop I had been drooling over for years!:

This post may contain affiliate links for your convenience.
See my policies and disclosure page for more information.
After that it was time to change up those basic cabinets into something more custom. I had a plan to transform the drawer fronts to match the simple Shaker design of our uppers.
Online it looked like the drawer fronts were completely flat. But when I picked them up I realized they had a slight bevel to them:

With that bevel my plan wasn’t going to work. I sat on it for a couple weeks to figure out what I wanted to do. I finally decided I would build new drawer fronts out of mdf and add the thin trim on the front.
But as I was looking at the drawers one day, I had an idea. I wondered if I could just turn them around and have the flat side facing out. I took one off, flipped it around…and really liked it! The bevel looked fine turned back against the cabinets, and the back side gave me a nice flat surface to work with. YES! This was going to be way less work and money.
Once I had that figured out, it was time to start painting. I took off each drawer front (there are screws inside the cabinet drawers) and laid them in order on the counter. Before I started painting, I used a drill bit to drill through the holes where the screws went so I could attach them back on in the exact same spots.
Just like my warning when installing cabinet hardware, be sure to drill straight through from the top of the drawer, not at an angle. If it’s at an angle they won’t attach the exactly the same and be level.
Then I filled the holes on the new “fronts” and started painting:

You can see my tips for painting cabinets by hand here.
You may recognize this color! I’ve used this Cyberspace paint color in our dining area and family room. I LOVE it! It’s a beautiful navy/gray color.
After the drawers had two coats each (and a light sanding between), I started on my trim pieces. I wanted them to be as smooth as possible, so instead of the lattice I usually use for projects like this, I picked up some four foot poplar strips that had very little grain:

They are a quarter inch thick by two inches wide. At first, I made the mistake of starting to add these to the drawer fronts while they were off the cabinets. It was easier to work that way, but I found it was better to do install the trim while drawers were in place.
It’s much easier to make sure the sides of each cabinet are exactly the same if you add them while they’re installed. Otherwise even the slightest change in height or width from one drawer front to the other will be noticeable.
I glued and nailed each strip onto the drawer fronts:

I had already painted the frame of the cabinets with the drawer fronts gone — that part goes very quickly.
It was as I was installing the fronts that I realized the paint sheen I had used (that was leftover) was satin. I wanted semi gloss — so I gave everything one more coat in the semi-gloss instead. (I told you this room has giving me many fits!):

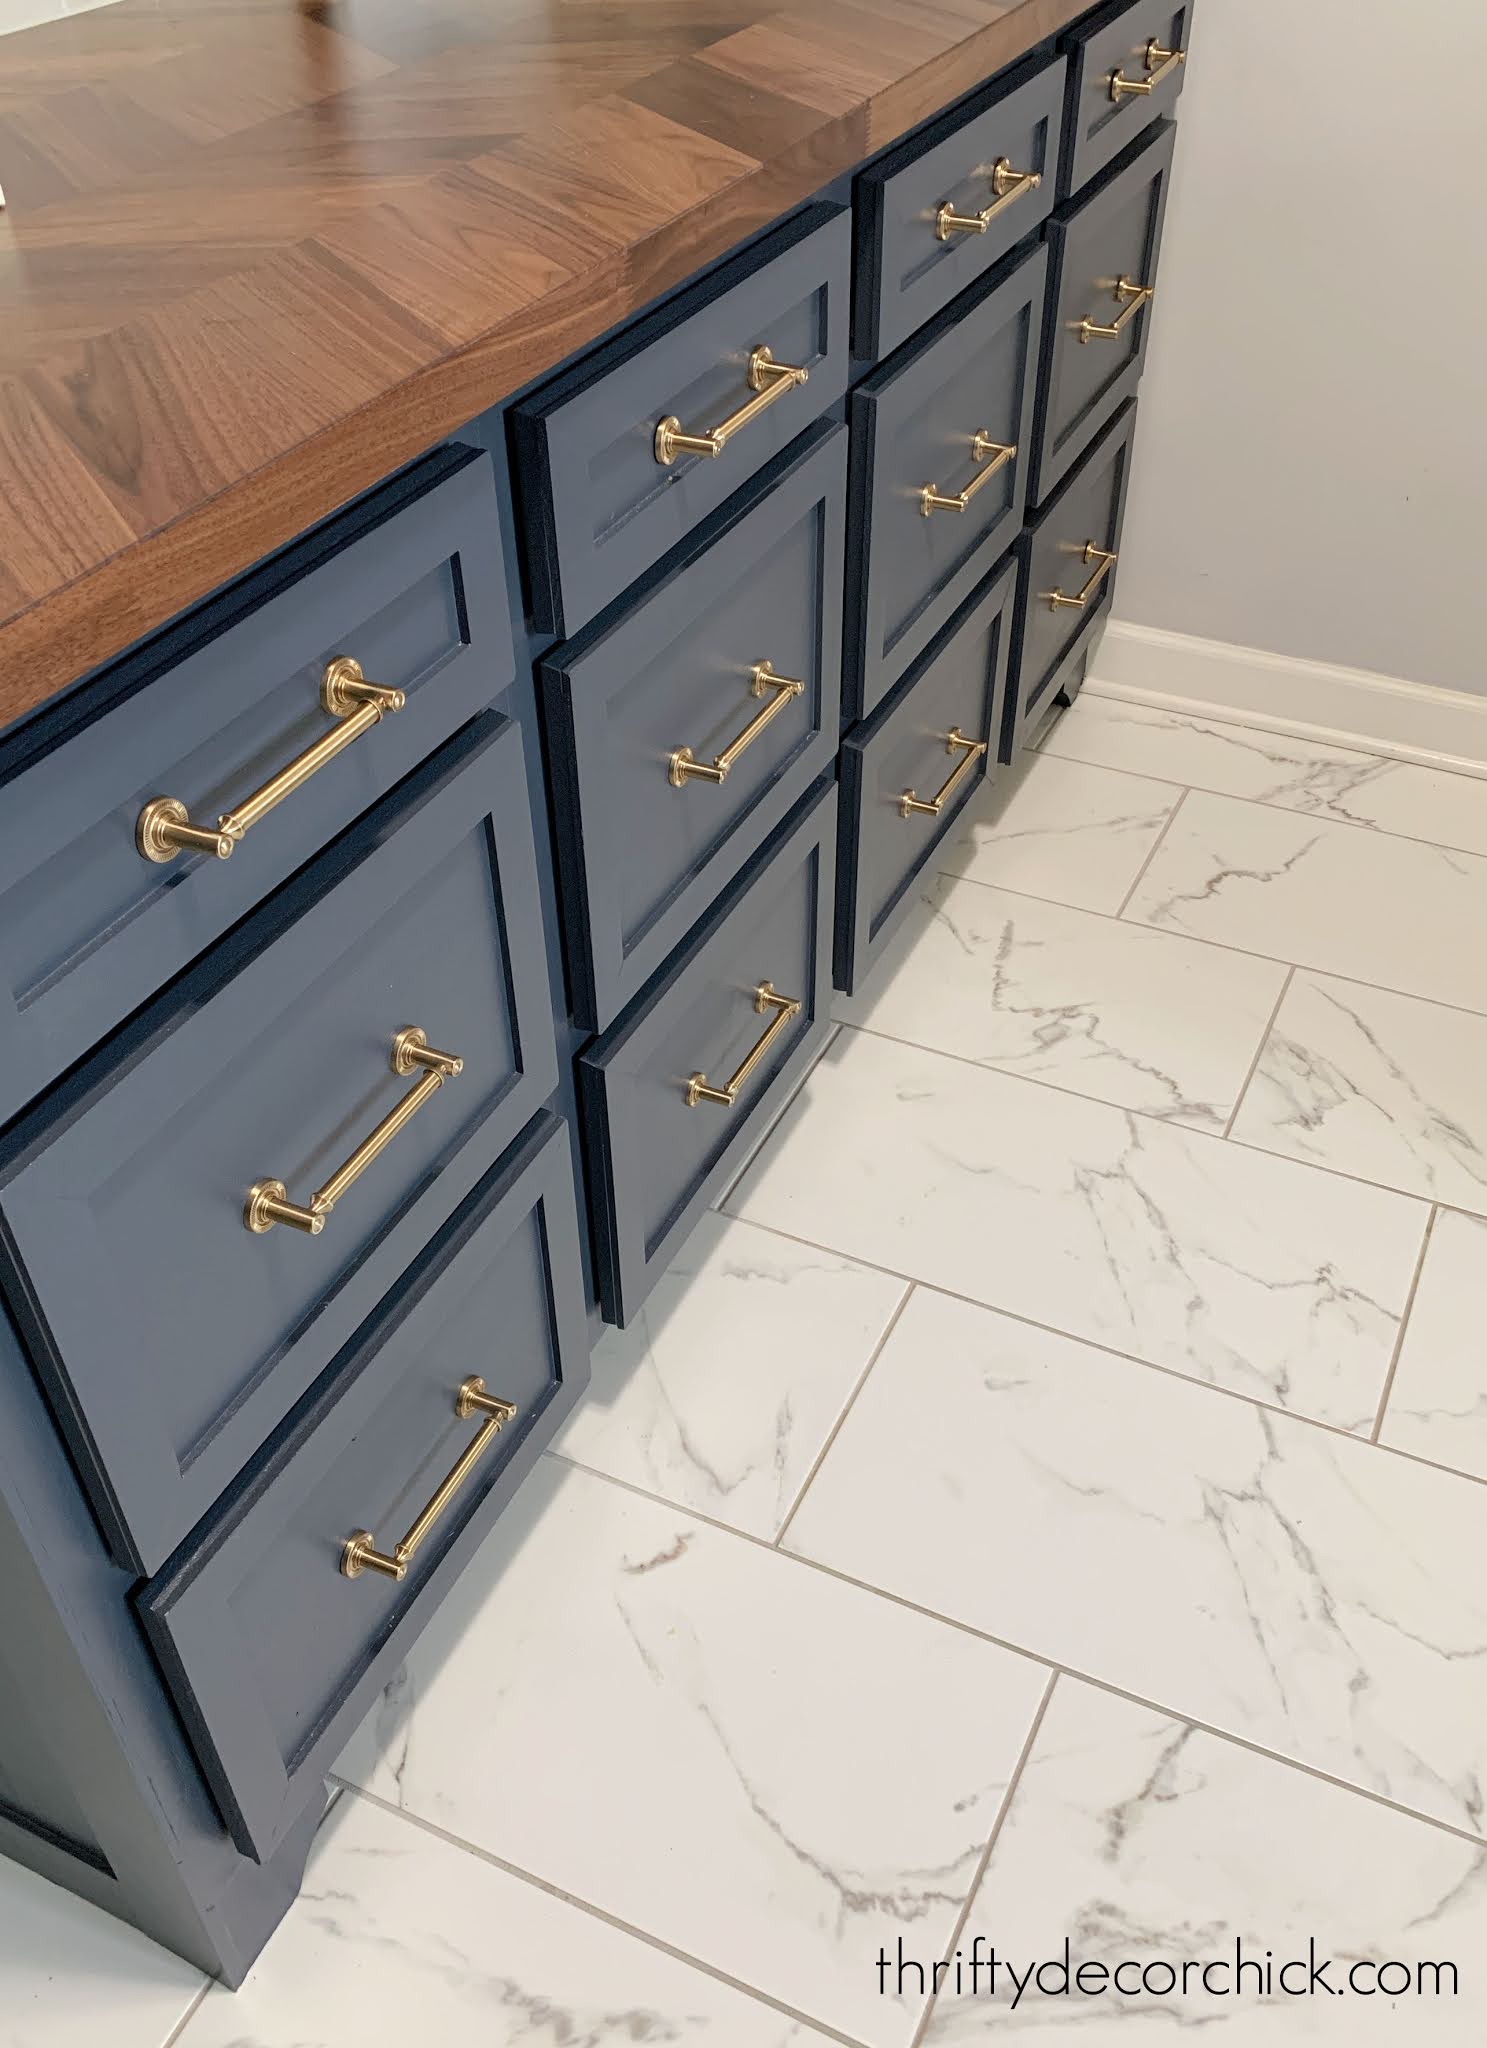
I found these awesome acrylic and brass handles online and really loved them:

But I kept hesitating on installing them, and finally decided they felt a little too modern for this room (or our house really).
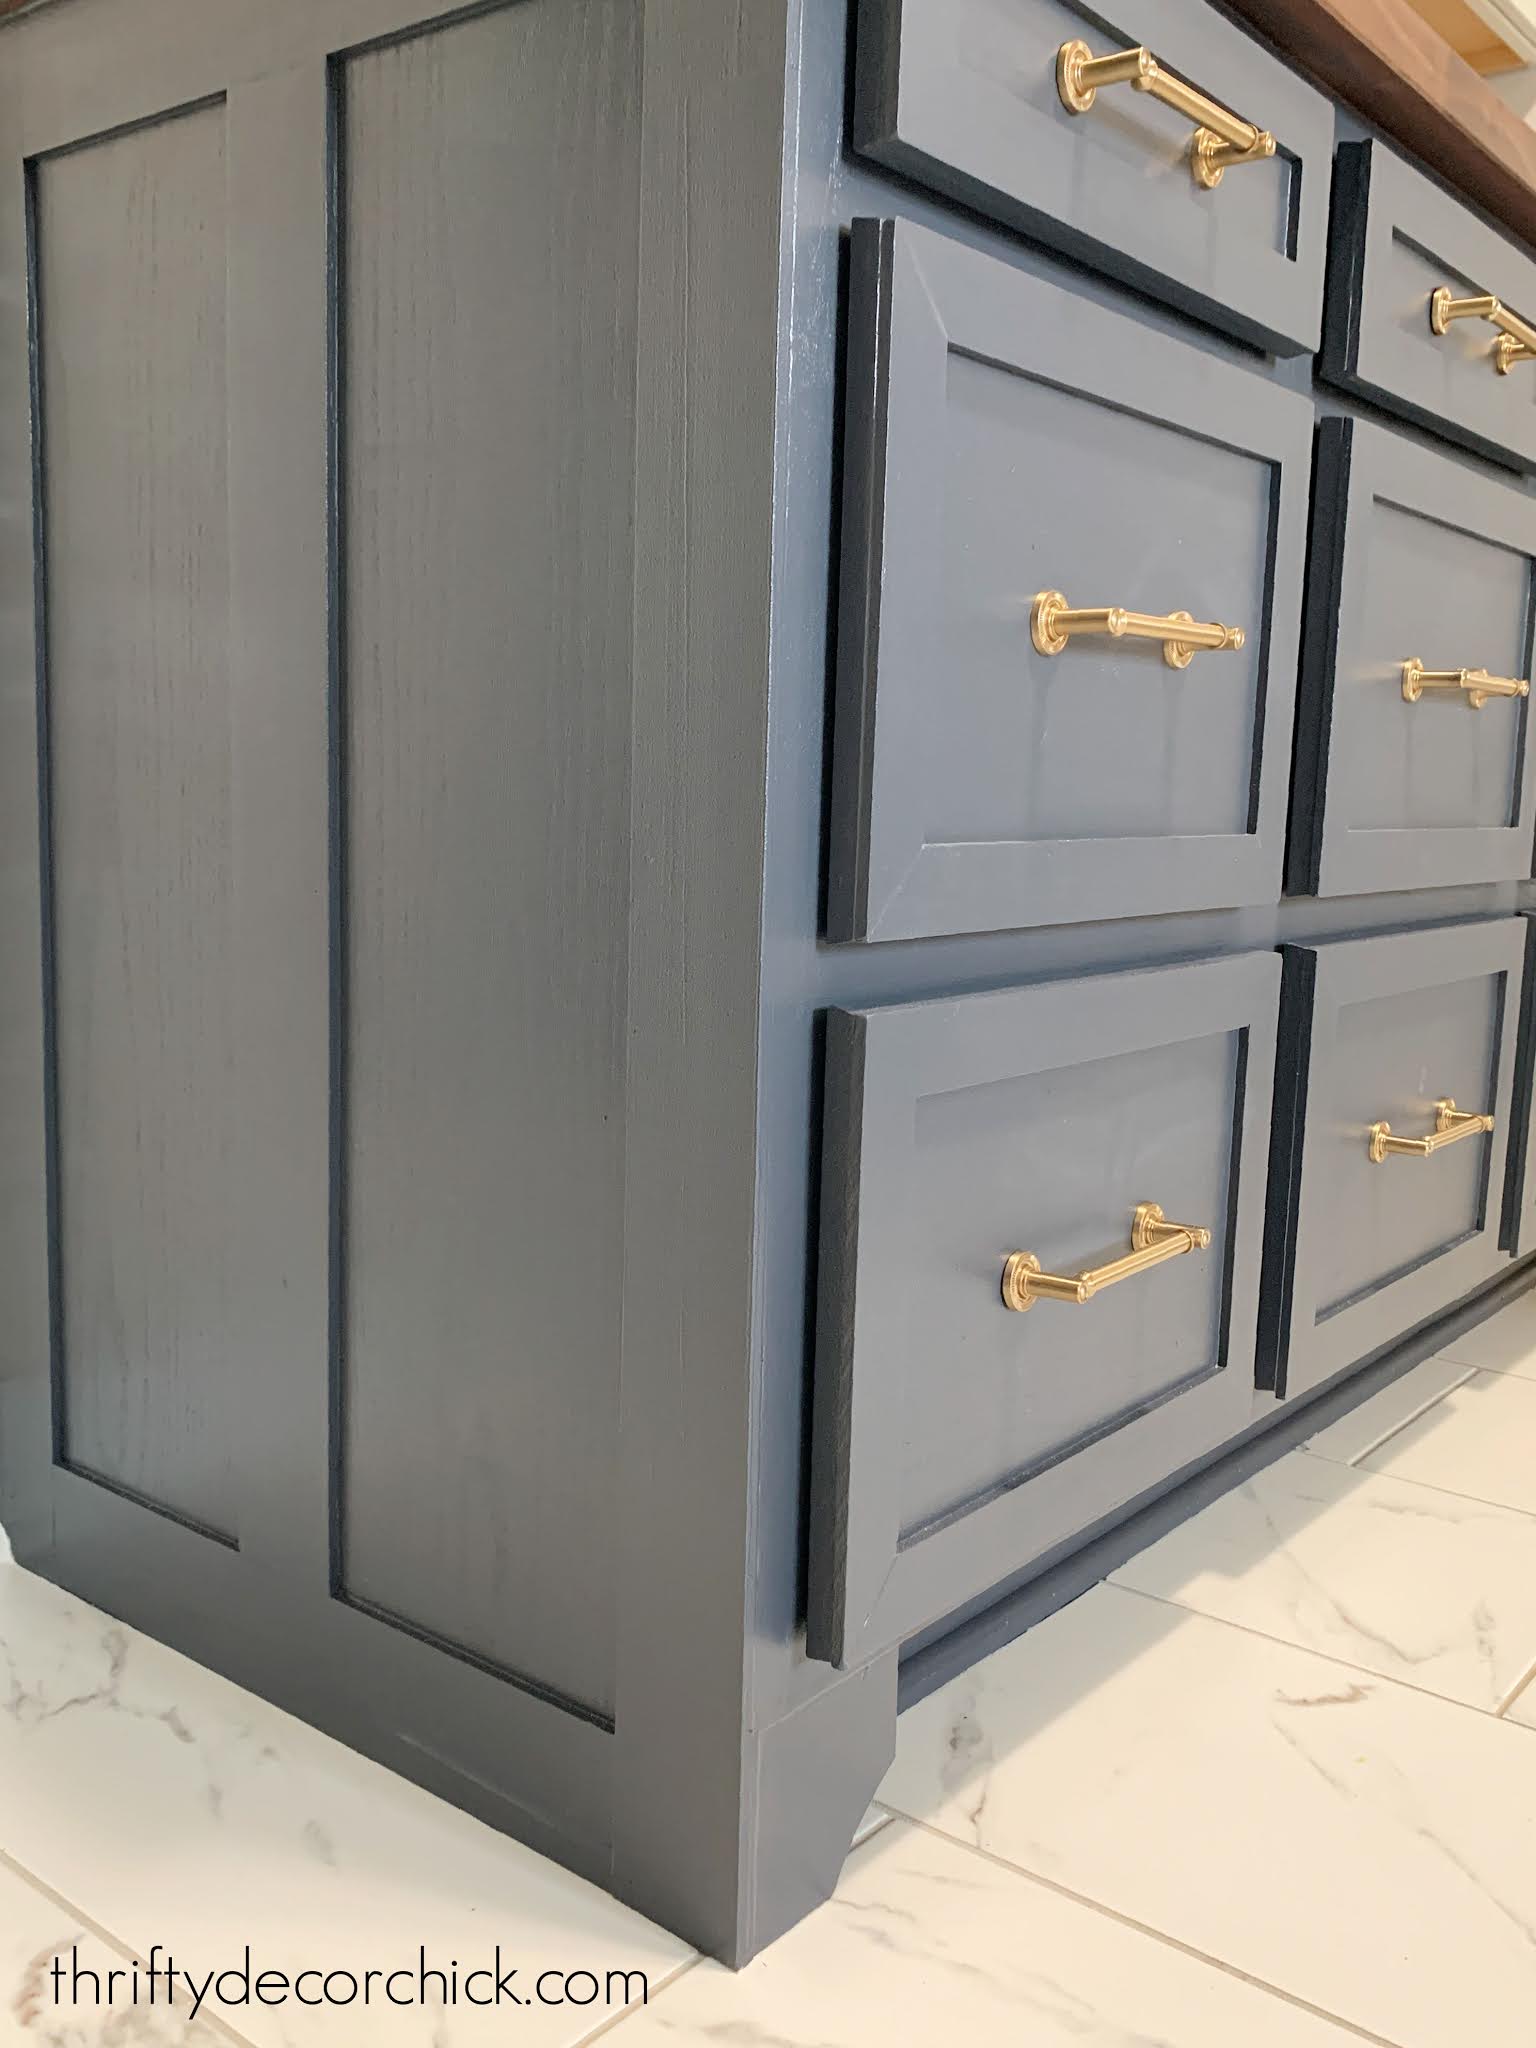
I ended up ordering the brass hardware I used in the basement instead and I’m SO glad I did:

They are more substantial and look SO good against the dark, dusty blue!
I also repeated a couple of other projects from our kitchen — I added the custom trim to the end of the cabinet and then installed the cabinet “feet.” They both add custom touches to the cabinets!:
I was careful with my photo angles because I’ll be showing you the tile next, and it is SO pretty! 🙂
Here’s where we started with this wall a few weeks ago:

Here it was with the upper and lower cabinets installed:
And here they are painted, trimmed out and with a little brass bling!:
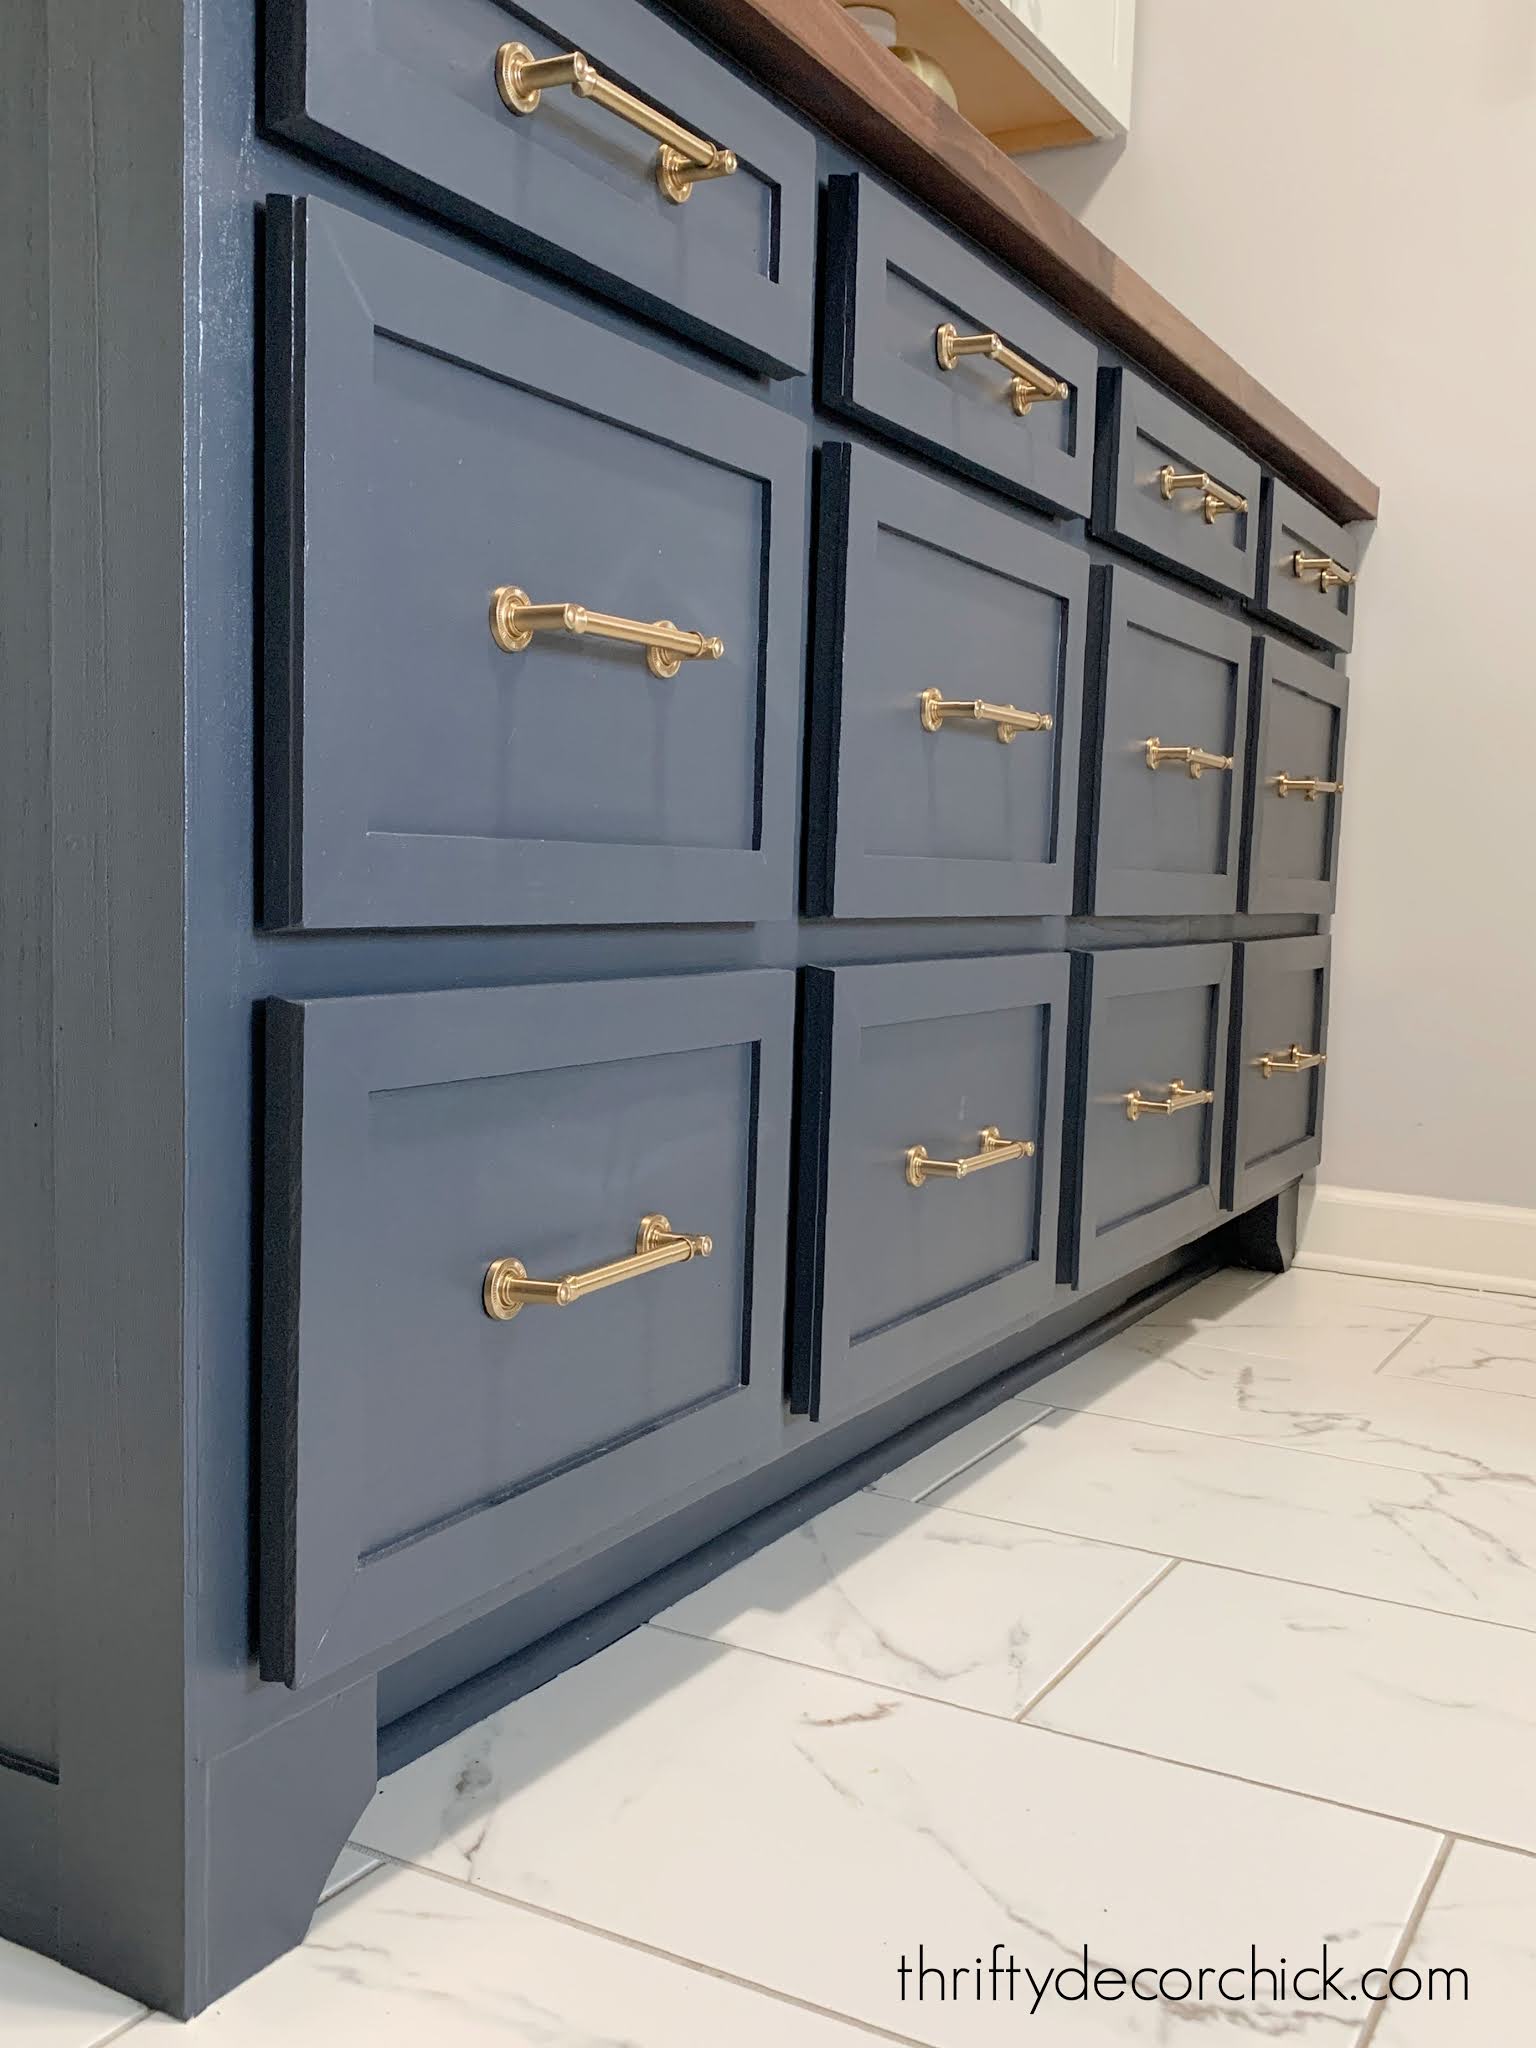
I just adore that dark wood, moody blue and brass combo. It looks like a piece of furniture, and I love that! Even though the DIY projects in here have given me problems, they’ve all been worth it! This has become the prettiest room in our home by far. 😍
I’ll be back this week to share the tile and install!
Here are links to products and DIY projects pictured in this post:
Brass hardware pulls I used
See more of our home here. To shop items in our home, click here! Never miss a post by signing up to get posts via email.


