Soooo, remember last week when I shared the projects I was hoping to tackle this year and I didn’t mention this big one? Yeah. 😂 I planned to start this HUGE built in project later in the year, but then I realized we spend more time in the basement in the winter…so why not get it done now?
And when I started figuring out materials I discovered we had money in the budget to at least get this project going. It helped that the cabinets I needed were on sale!
**Quick note: If you are reading this post via email, you will now have to click through to read my posts. I had no choice but to change it when one of my affiliate companies made it a requirement. Just click the “read the whole post here” link!
If you would like to get my posts via email you can sign up here.
I’ve built a few versions of these built ins using kitchen cabinets many times before. I’m telling you…using cabinets makes this SO much easier (and quicker) than if you were to build those yourself. They are awesome!
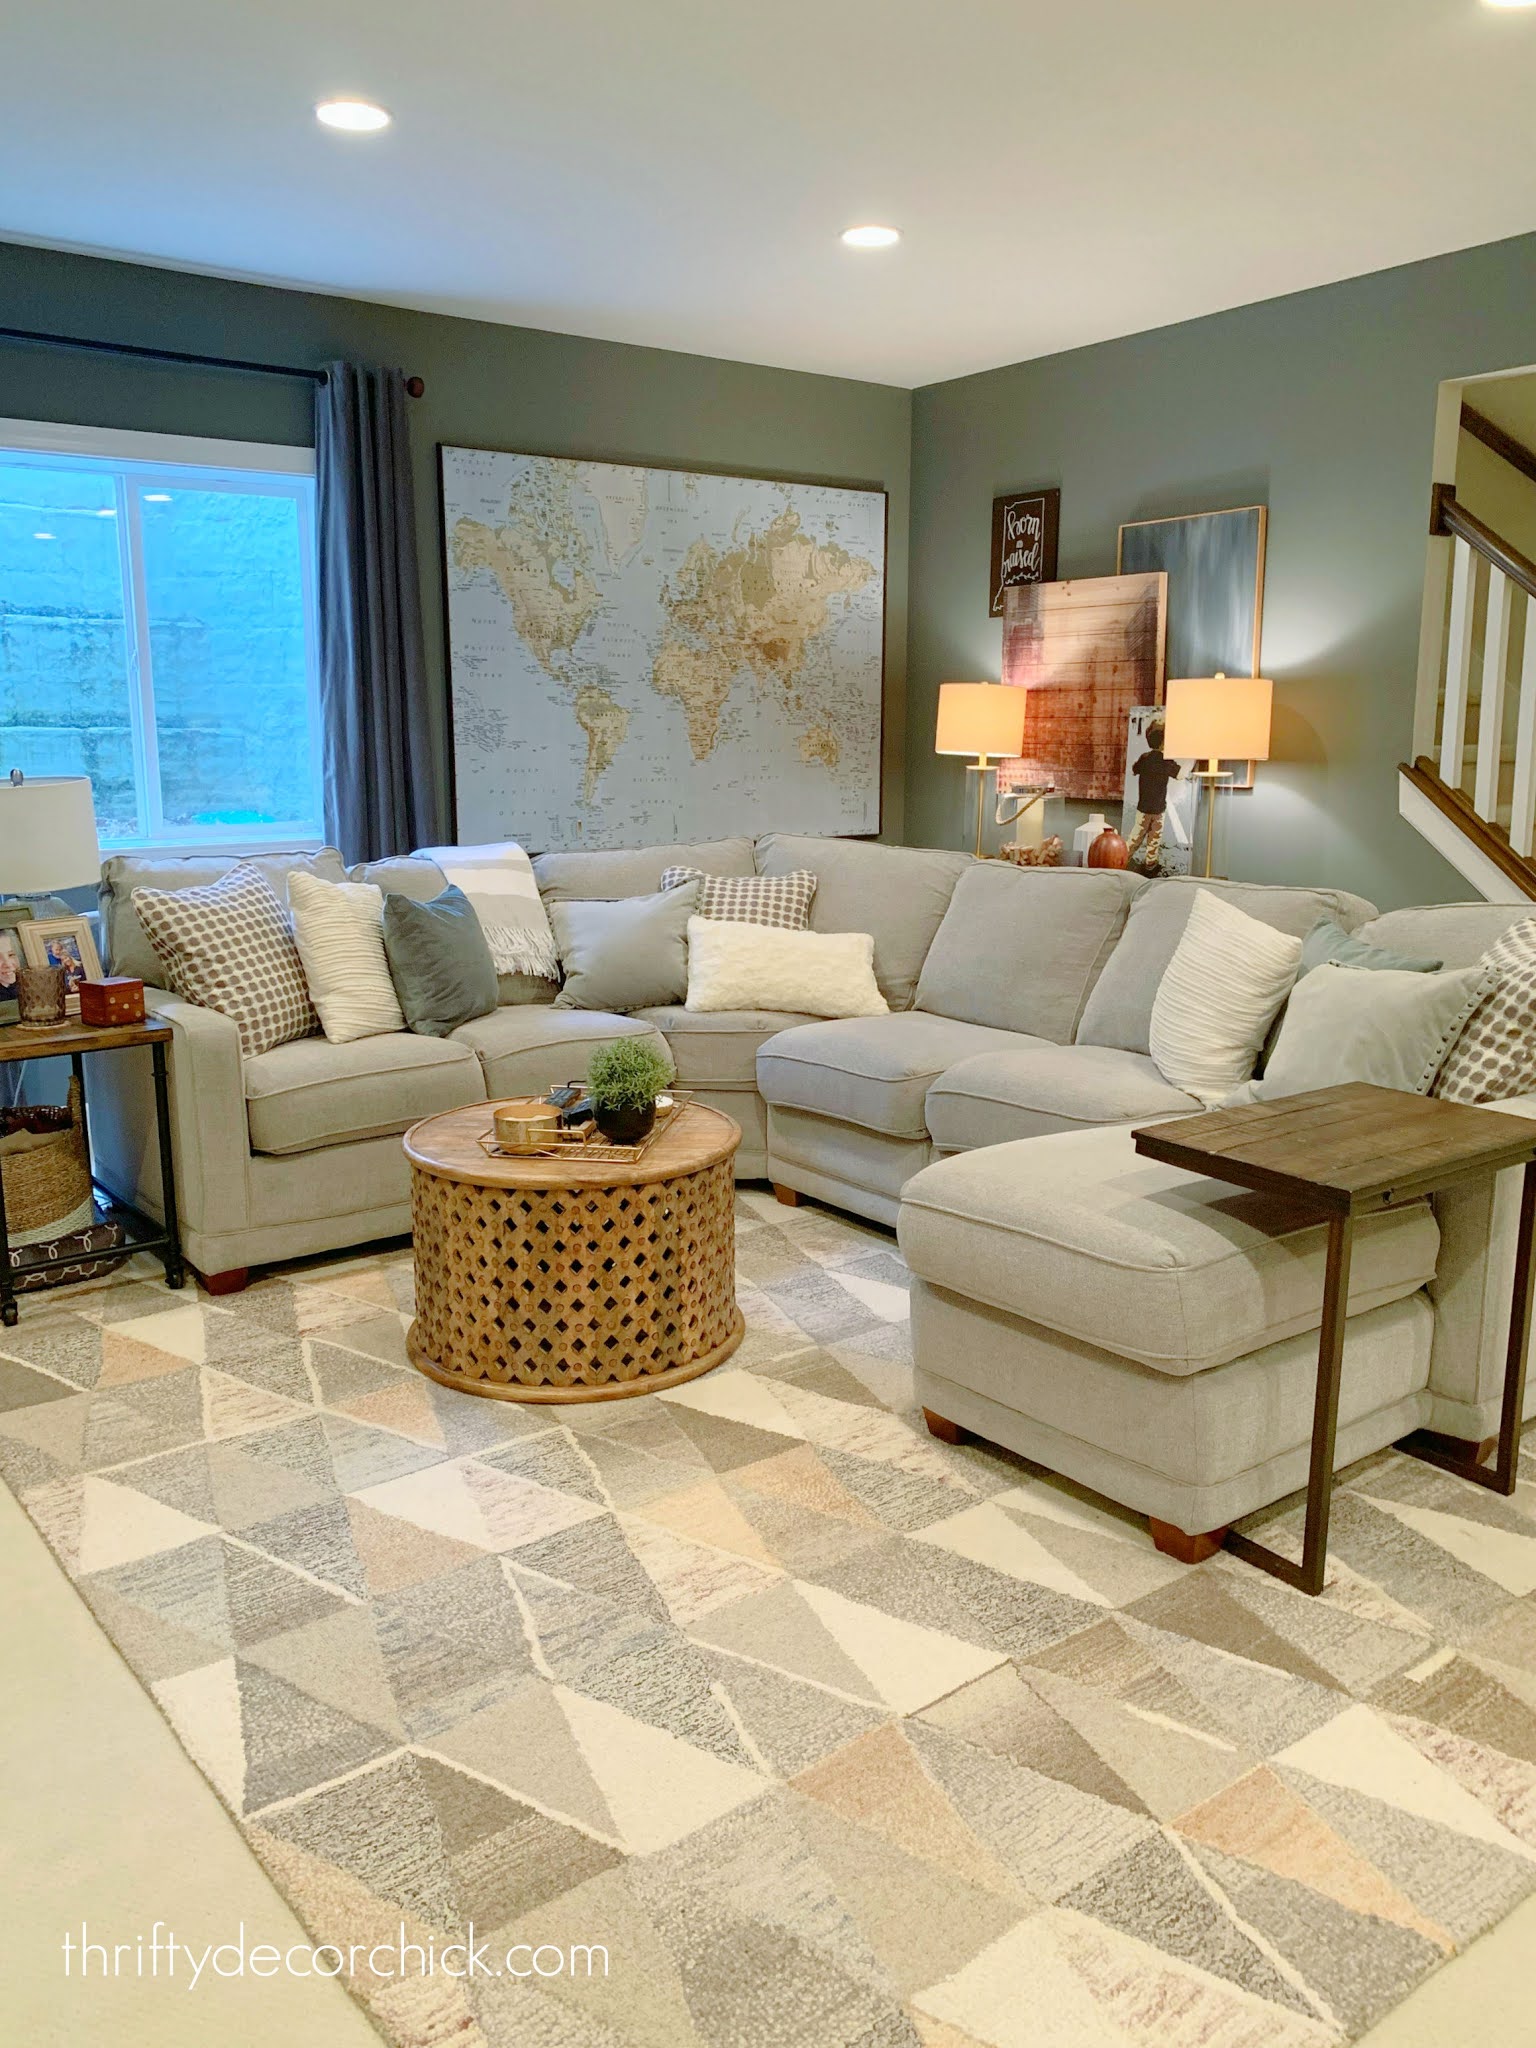
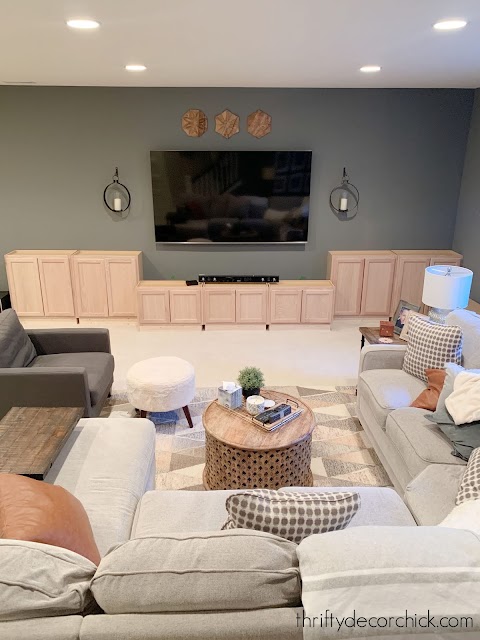
This side of our basement family room has looked great for awhile:
I think I’ve only shared the other side of the room once because it’s just a loooong wall:

This post may contain affiliate links for your convenience.
See my policies and disclosure page for more information.
I just hung a few things up there two weeks ago…and now I’m going to take them down. Sometimes I really plan out when I’ll start a project and sometimes I jump right in. This one is the latter. 🙂
The wall is SO long, so I’ve known since we moved in what I wanted to do. Sorry for the bad quality, I didn’t have great light when I took these:

The ginormous television is courtesy of my husband. I would not have picked it, but I do secretly love it.
When I thought about starting this project the other day, I sat down with my old school graph paper to sketch out my plans (trying to keep things proportional):

Oh, how I LOVE doing this! It’s one of my favorite parts of DIY projects. I love sitting with a pad of paper and mapping out my ideas. This will be my biggest build yet! Before now the longest I’ve done is 12 feet.
I only use upper cabinets to create built ins because they don’t take up as much room, and they don’t have the drawers like most base cabinets have. You’d be surprised at how much you can still fit in them!
Before I could start the build process, I had to remove the baseboards: 
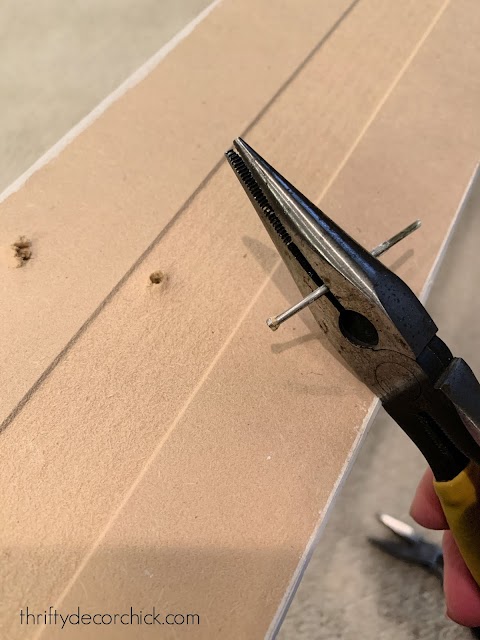

You can see how I remove baseboards without damaging the wall here.
I’ll be using these again, so I removed all of the nails and caulk:

To make these more custom looking, you’ll want to get the cabinets off the ground a bit. You can do a toe kick like in the kitchen, but instead I like to wrap the fronts with the baseboard and tie them into the rest of the room (this is why you want to save the base) so it looks like a custom built in.
To do this, you’ll need add wood braces under each cabinet. I always use the most basic pine for this part of the project.
Just wrap the inside of the base to raise up it up a bit — I nail them into the front, sides and back of the cabinet. The size of the wood will depend on the height of your baseboards. I want the baseboards to sit on the front of the cabinets instead of underneath:


I used 1×5 boards for that part and it works great! Btw, the only place I’ve found the five inch height (which is really around 4.5 inches) is at Home Depot, but again, your size will depend on your baseboards.
You can find these unfinished cabinets at almost any big hardware store. It’s SO great that you can order online now and they will bring them out to you! Are these the BEST quality? No. But they’ve always worked wonderfully for us and they are easy to dress up with paint and hardware. I may make new doors for this project…I’ll decide on that later.
After the supports are on the bottom, it’s time to start placing your cabinets. When you get them set in place you can figure out where you need to create access to the outlets. Measure where your outlet is on the wall and then mark those measurements on the back of the cabinet to cut it out:

This battery-operated oscillating saw makes easy work of it!
I still have to drill a few more holes and cut the back off of one cabinet (more on that later), but they are ready to be installed into the wall!: 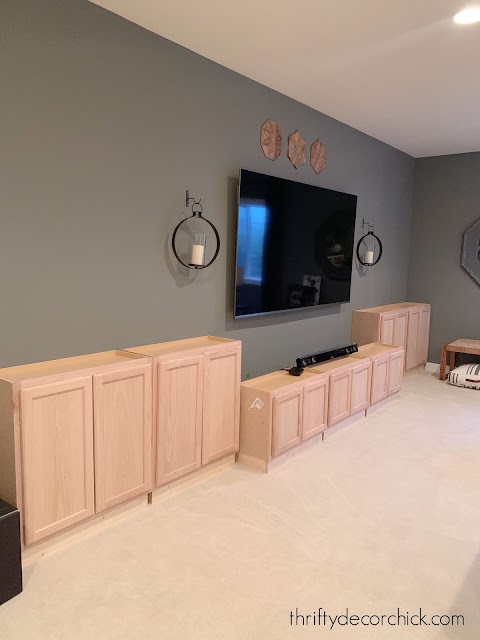


It’s a BEAST! But this wall is long so it needs something substantial. You can see how I’m pulling the middle cabinets out a bit to make a bench — those are the 18x30x12 cabinets. The others are the 30x30x12 size.
I would have these installed and counters on by now, but we have to wait to have sconces wired. They will be at the top of built ins like I usually do. I could do the non-electrical lights like I did in my office, but I’d like to have something a little brighter that we can also dim while watching TV. If you have an outlet below, it’s almost always possible to add sconces above!
As soon as those are wired I can install the cabinets, get the countertops and baseboards on and then start painting. Then this part at least will be usable:

I’ve already had to switch gears on a couple things since I drew out my plan. You may notice that I had a fireplace that was supposed to be installed under the TV. We thought we’d have room, but with the TV speaker it just won’t work.
So I was able to use taller cabinets for the bench in the middle instead of the 12 inch versions I planned to use. This is a much more comfortable height for a bench and the proportions just look better. We think we found a new spot to do the fireplace someday, so I hope to share more about that soon!
I’m getting good at this project! If I didn’t have to wait for electrical work to be done I could finish this up (except paint) in a week! But I am forced to be patient, which is better for our bank account anyway. 😉
My first DIY bookcase took me about eight months and my Dad helped with most of it. My office took about six weeks…and this one I think will take about half of that. I’ll share a few of my past built in projects below! Hopefully I’ll have more progress to share with you soon.
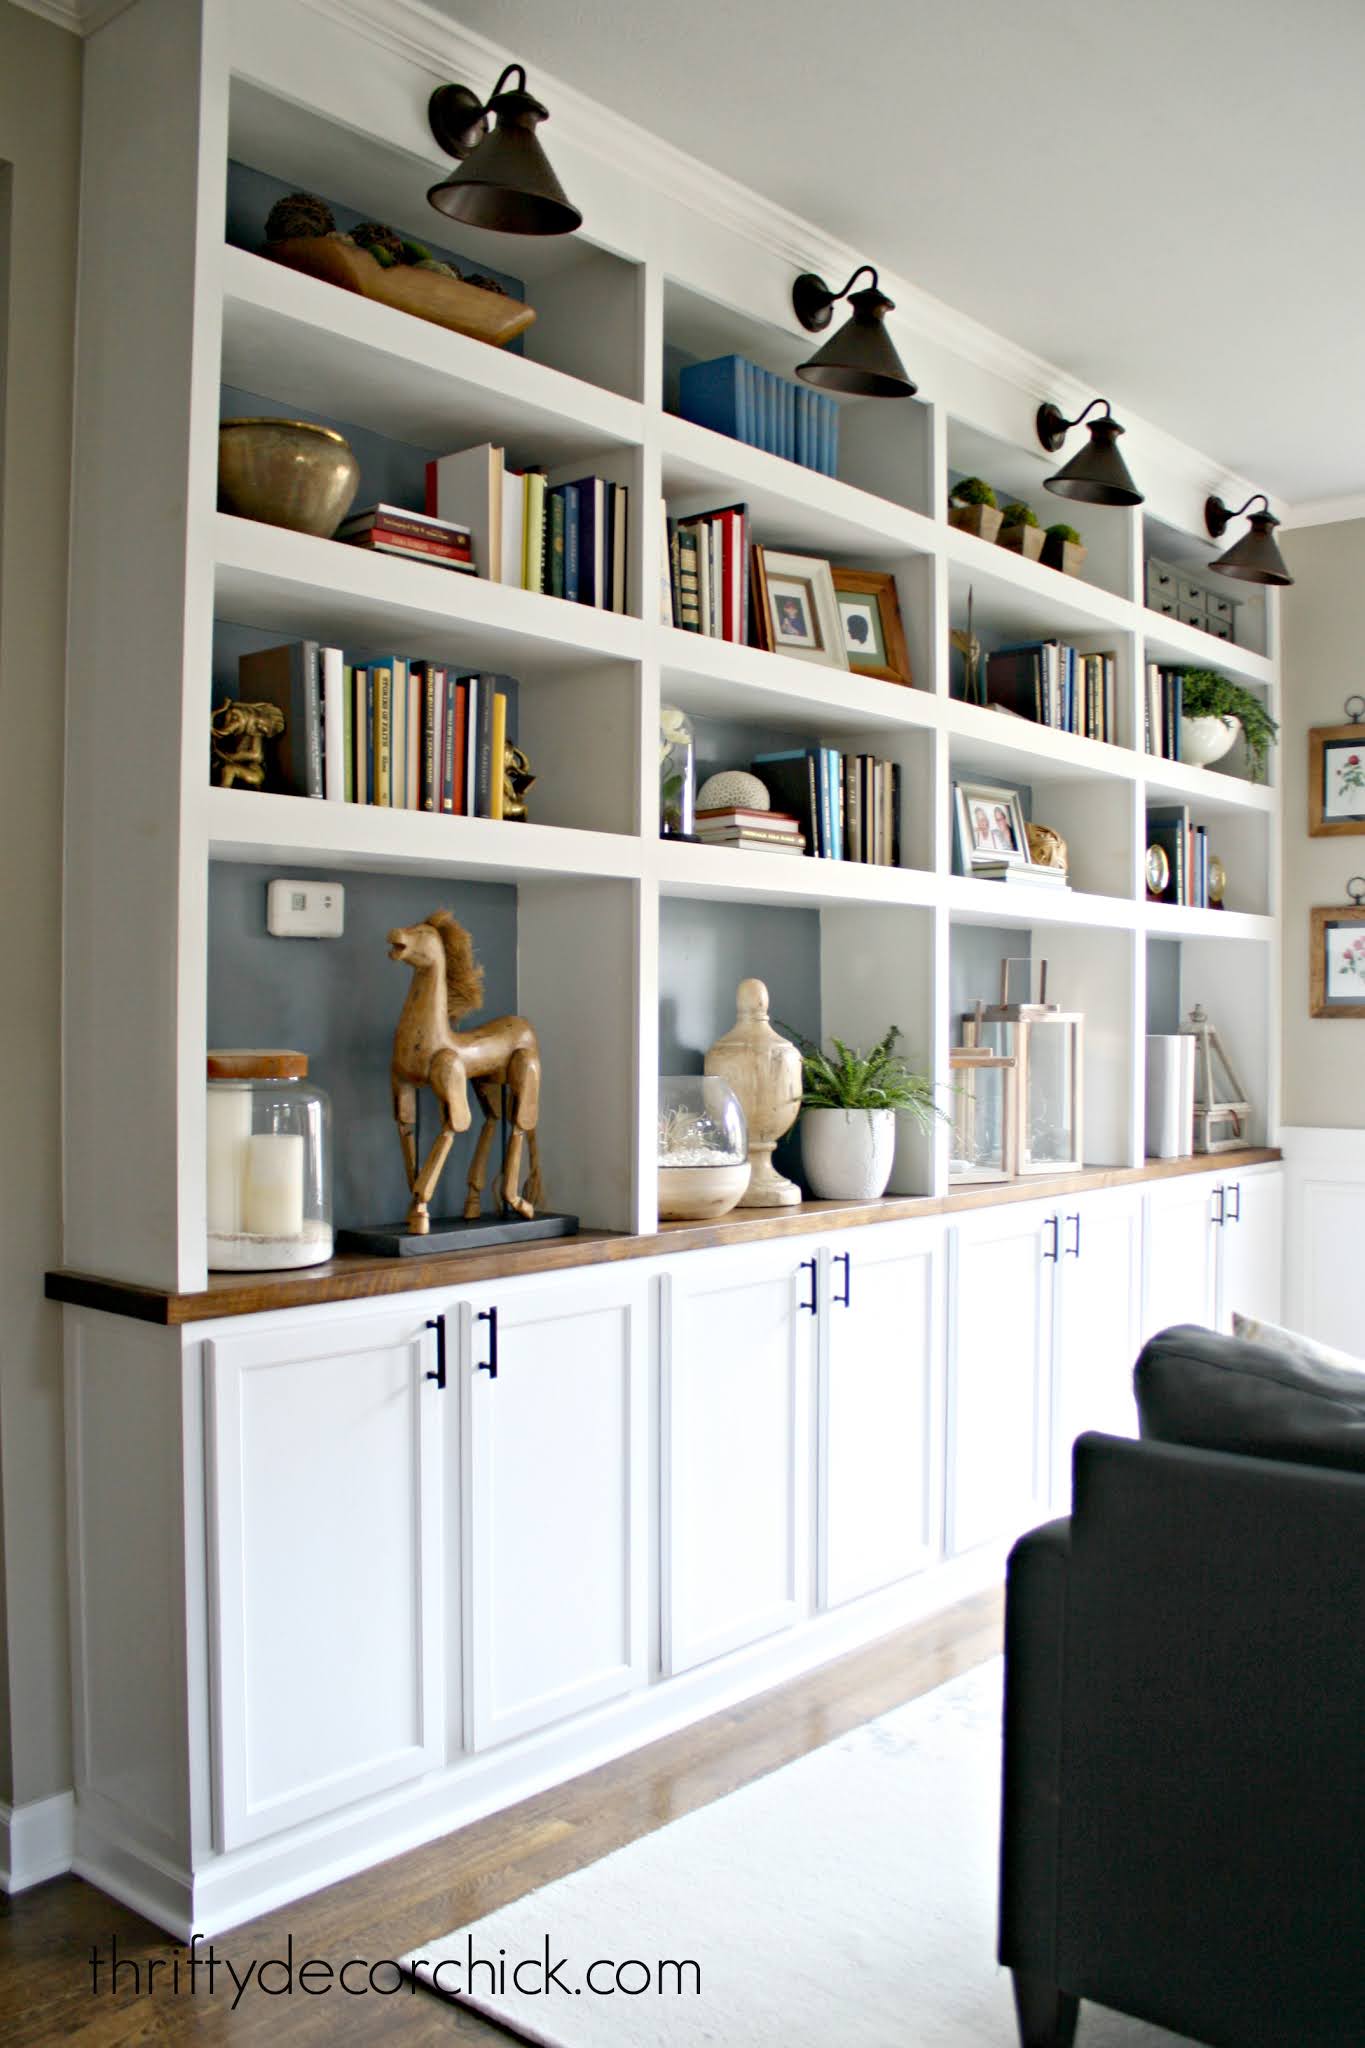
You can read all about the dining room turned library bookcases here:

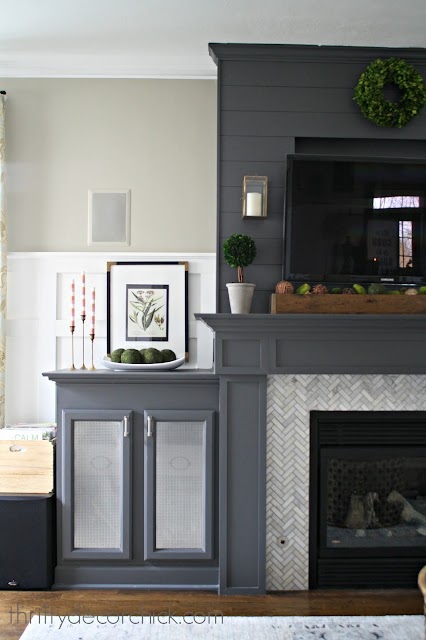
We used them to hold sound system stuff here:

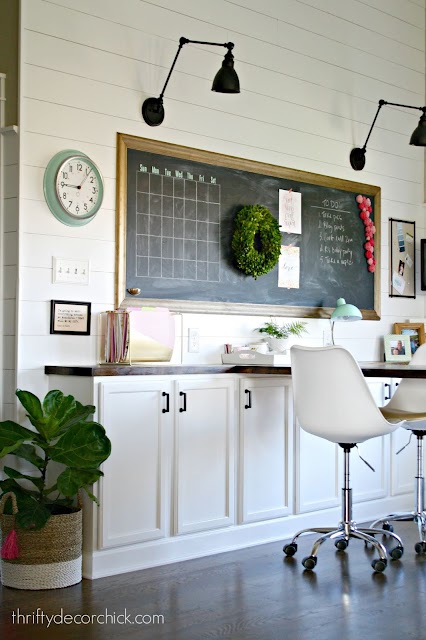
And finally my office built in bookcases here:
See more of our home here. To shop items in our home, click here! Never miss a post by signing up to get posts via email.


