If the insulation in your house’s HVAC ductwork has seen better days, consider replacing or upgrading it to improve energy efficiency and reduce your utility bills.
This is particularly true if the ductwork is located in the attic, where the intense summer heat can make your air conditioner work overtime to cool your home.
When working with fiberglass insulation, always wear:
Gloves are a good idea, too, but it can be hard to do the delicate fitting and taping required while wearing them.
Repairing Leaks in HVAC Ductwork
Start by turning your heating/cooling system on and feeling along the ducts for air leaks. Pay particular attention to any joints or connections in the ductwork, and mark any air leaks you find. Then turn off the HVAC unit.
Cover any air leaks with metallic foil tape made for sealing ductwork. Don’t use standard cloth duct tape on HVAC ductwork, since the adhesive won’t hold up to extreme temperatures.
For an added layer of protection, you can apply duct mastic to the tape and duct.
Insulating HVAC Ductwork
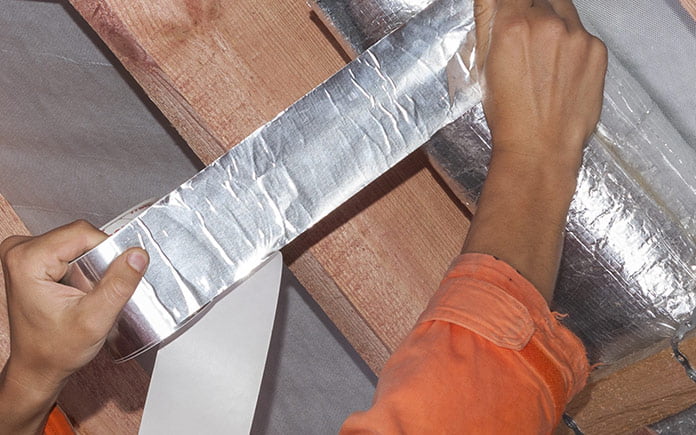
When insulating HVAC ductwork, use a foil, faced fiberglass insulation with an R-6 or higher R-value. Use the type of metallic foil duct tape recommended by the insulation manufacturer to seal and hold the insulation in place.
Make sure the foil surface of the insulation is free of dust before applying the tape. Peel the paper backing off the tape as you apply it to prevent the tape from sticking to itself.
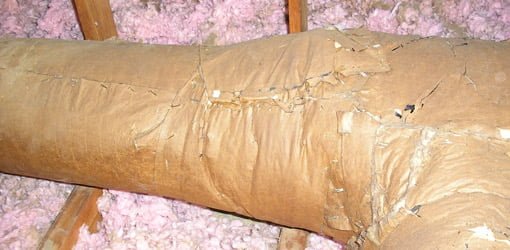
If your existing duct insulation is in fairly good condition, an additional layer of duct insulation can be applied over it. If the old insulation is in poor condition, remove it and replace it with new insulation.
Cut the insulation to width and length, using a square and a sharp utility knife, so that it fits snugly around the duct without compressing the fiberglass.
Apply several small pieces of tape across the insulation seam to hold it in place, then seal the entire length of the seam in the insulation with a long strip of tape.
Where the sections of insulation join together, apply tape all the way around the joints by sliding the tape under the duct, then peeling off the paper backing once it’s in position.
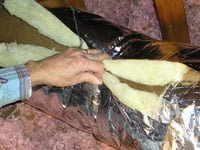
Carefully cut and fit the insulation together where the branch lines and registers come off the main trunk line, making sure there aren’t any gaps.
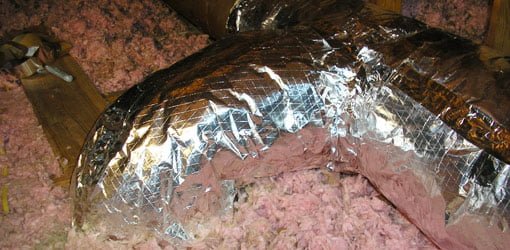
Check that every seam and joint in the foil facing on the HVAC ductwork insulation is sealed securely with tape. This will prevent moist outside air from penetrating the insulation and condensing on the ductwork.
 | It’s Keep Your Cool Week, sponsored by American Standard HVAC! Give your air conditioner some TLC — click for all the money-saving advice you need to stay cool and comfortable this summer. |