Tackling DIY projects together is a great couples activity. You might have heard the saying, “The family that plays together stays together” — it rings true because quality time strengthens every relationship, whether it’s a father and daughter or husband and wife.
Here are three great do-it-yourself projects to try — they’re manageable with a little time and teamwork.
Best of all? Each of these DIY projects will enhance your home and it will have a fun story behind it!

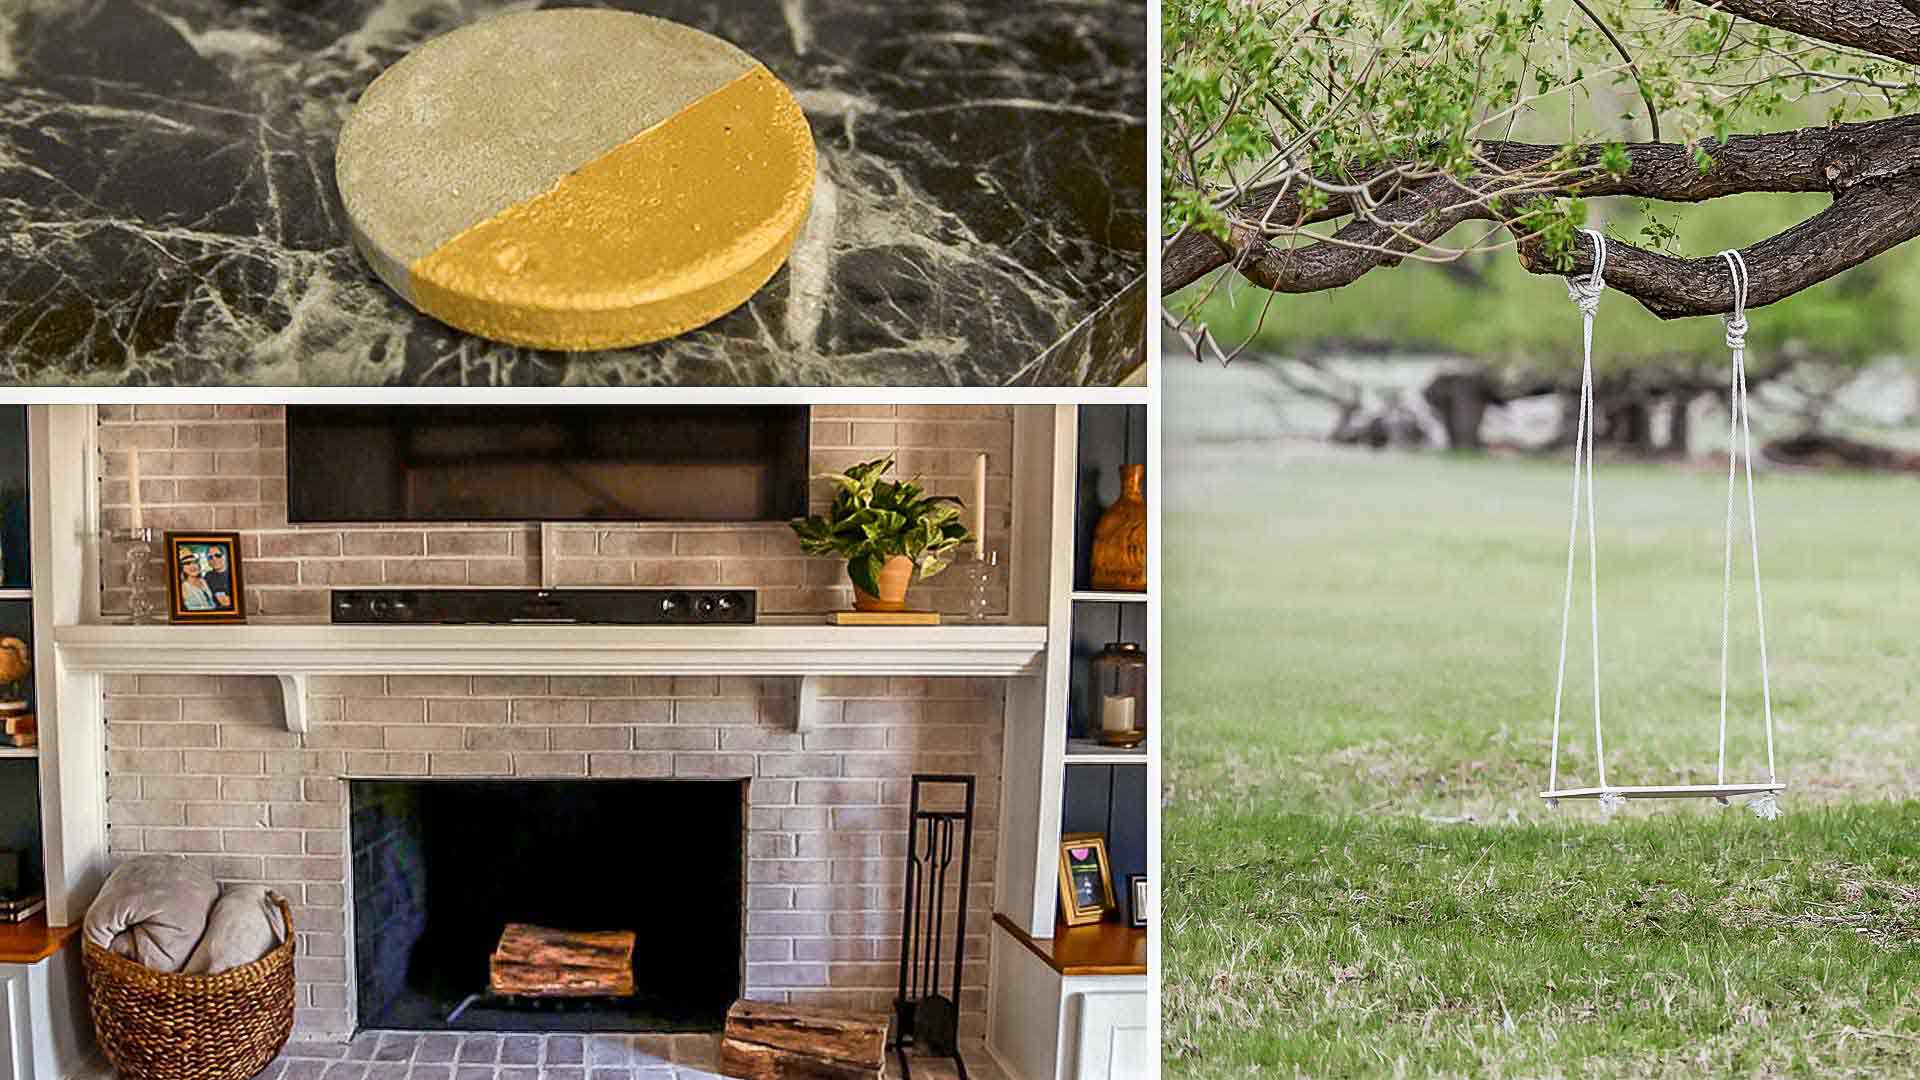
1. DIY Concrete Coasters
The best DIY projects are the ones that look great and improve your home’s function, and that’s just what these gold, glam concrete coasters do.
These coasters are great conversation pieces — while sitting on a table, they will definitely catch guests’ eyes! — and they will keep your furniture free from drink stains!
What You’ll Need:
- 1 bag Quikrete Fast-Setting Concrete
- 2 tablespoons (one for concrete and one for water)
- Molds
- Cooking spray
- Container for mixing (an old yogurt container or a plastic cup work great!)
- Sandpaper
- Painter’s tape
- Paint and paintbrush
- Sealer
- Glue gun
Directions:
First, lay out everything — there’s no time to waste looking for things once you start mixing the concrete. Then spray down your molds with cooking spray.
Wear some gloves and mix 13 tablespoons of Quikrete and 10 tablespoons of water for each coaster. Add the concrete to your mixing container first, then add the water. Your mixture should resemble thick pancake batter.
Pour the mixture into each mold and lightly tap the sides and bottom with a rubber mallet or hammer. The tapping gets rid of bubbles in the concrete. Then let it sit and harden according to the package instructions on the concrete bag you used.
Once the concrete sets, your coasters should fall right out of the molds! When that happens, you can sand any rough edges or ridges in the concrete using sandpaper — 100 and 220-grit sandpaper are fine.
Now, grab some painter’s tape to make a cool design on your coaster — we painted gold on one side of these coasters. Once you have the paint on and it is dry, you need to seal it with a clear, spray-on top coat.
Finally, to protect your tables and countertops, glue pieces of felt to the bottoms of your DIY coasters.

2. Limewash a Fireplace
A fireplace makes any bedroom feel warmer even when it’s not in use, but a dated fireplace surround can quickly kill the mood.
Whether you’ve made over your bedroom and just haven’t gotten around to the fireplace, or you want to transform your fireplace to kick off a modern master bedroom makeover, there’s an easy DIY project for it: limewash!
Limewash is a thick, clay-like material that you mix with water. The amount of water you add determines how thick or thin the wash will be.
If the bricks have soot on them, clean them with a stiff-bristle brush, then mix the limewash solution until it’s smooth and free of lumps.
Next, use a spray bottle to dampen the bricks one section at a time. Working from the bottom up, spread the limewash solution onto the bricks using the stiff-bristle brush or masonry brush. Go ahead and get a good coat on the mortar joints as well. And, if necessary, use a paintbrush to cut in around the mantle or other obstacles.
After about 15 or 20 minutes, you can begin distressing the bricks. Lightly spray the surface with water before using a sturdy rag to wipe off the excess paint, exposing some of the bricks’ color. Your preferences will determine how much or how little you remove. Continue this process across the fireplace, working on a two- or three-square-foot section at a time.
Don’t worry about making mistakes — this DIY project is very forgiving. Limewash is removable for up to five days so you can easily clean it off and try again!

3. DIY Tree Swing
A tree swing adds an old-world, majestic feel to your backyard — and this DIY project can be quite a romantic addition!
Installing a tree swing isn’t difficult, but choosing a tree and branch for it might be challenging. For instance, you’ll need to keep these pointers in mind: a sturdy hardwood tree’s branches, such as those from oak, are ideal. Avoid fruit trees, evergreens or trees that split easily.
In addition, a tree swing needs a horizontal branch that’s at least 8 inches in diameter and no more than 20 feet off the ground. The branch must be healthy, so you’ll need to inspect it from trunk to tip. You’ll also need to avoid branches that show signs of infestation, disease, splitting or narrow connections to the main trunk.
Finally, the branch should be large enough that the swing can hang at least 3 to 5 feet away from the trunk without the branch bouncing.
Ready to begin this DIY project? Not so fast! There are two main ways to hang a tree swing, so you’ll need to choose from one of the following:
Eyebolts: First, carefully drill a vertical hole all the way through the center of the branch, and insert a ½-inch diameter or larger, corrosion-resistant eye bolt, using washers and nuts to secure it to the tree. In time, the tree will grow around the bolts, making a permanent installation.
This method eliminates friction on the bark, but it also damages the tree. To make your rope last longer, attach a carabiner to the eye bolt, then tie the rope to the carabiner.
Rope: You can attach the tree swing to a branch using rope if you take steps to prevent the rope from cutting into the tree bark.
For instance, if you tie the rope around the tree branch, use a running bowline (or another slip knot) that will loosen when the swing is not being used, to allow the tree to grow larger without being girdled by the rope.
In addition, to protect the bark, use a rope sleeve or a piece of rubber tubing to reduce friction.
Choosing Rope
You’ll need to use ½-inch diameter or thicker rope to make it easy for hands to hold and provide enough strength. Options include:
Polyester Rope: Braided polyester rope holds up well to the elements, provides maximum strength and has little stretch.
Nylon Rope: While it’s the strongest rope, nylon is susceptible to stretching and can be too slippery for little hands to grasp.
Polypropylene Rope: This lightweight rope is the least expensive rope. Polypropylene rope makes a poor choice since it deteriorates rapidly in the sun’s UV rays.
Natural Fiber Rope: Ropes made from natural plant materials — such as manila, cotton, sisal and hemp — are not as strong as synthetic rope, will rot over time, and can break without warning. If you use a natural fiber rope on a tree swing, replace it every year or two.
Finally, here are some safety tips to protect your tree swing through the years:
- Make sure the rope, carabiners and hardware are rated for the maximum weight.
- Tie all knots securely to prevent unraveling.
- Inspect the tree branch, ropes and swing regularly. Look for splitting, fraying, missing bark or other damage, and repair right away.
- Replace the ropes every couple of years.
- Move the swing to new eye bolts if the tree grows over the ends.