This week, we’re converting a small detached garage into a home workshop for a very familiar homeowner.
This is my daughter Chelsea’s house. She bought it when she was fresh out of college and I helped her renovate it. It’s come a long way since Chelsea first set foot in it, but what started out as a perfect fit has begun to shrink a little.
That’s because Chelsea now lives here with her husband, Brandon, and their three children, Mary Helen, Gus and Lucy.
Chelsea’s given up on parking her car in her garage, so we’re going to convert the space into a workshop fit for a queen.

The Plan
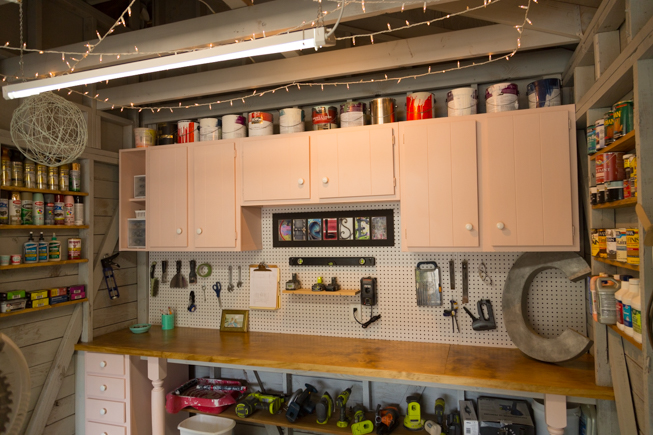
Chelsea wants to hang some old wall cabinets in her workshop, and beneath that she wants to add a bench running the full width of the cabinets.
To round things out, an old refreshed dining table that Chelsea made over for her web series, “Checking In With Chelsea,” is the perfect piece of furniture for working on all kinds of projects.
In fact, Chelsea builds lots of projects for her web series in her workshop, so it needs to be, in her words, cute.
‘Wash’ the Wood Walls
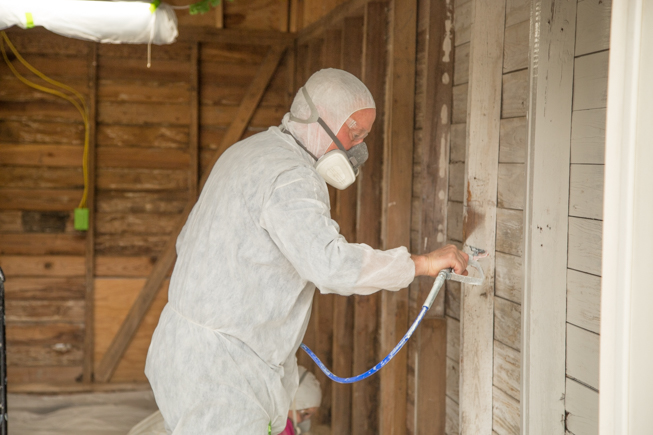
After we’ve decluttered the workshop, we apply a wash to the rustic wood walls.
To do this, we take all of Chelsea’s leftover paint cans — 17 of them — and mix them in a bucket.
Tip: Make sure you have enough leftover paint for your project because it will be hard to produce this same color again!
Finally, we add some water to convert this paint to a “wash.” It makes the room much lighter, and you still see the wood’s grain.
Paint Recycled Cabinets
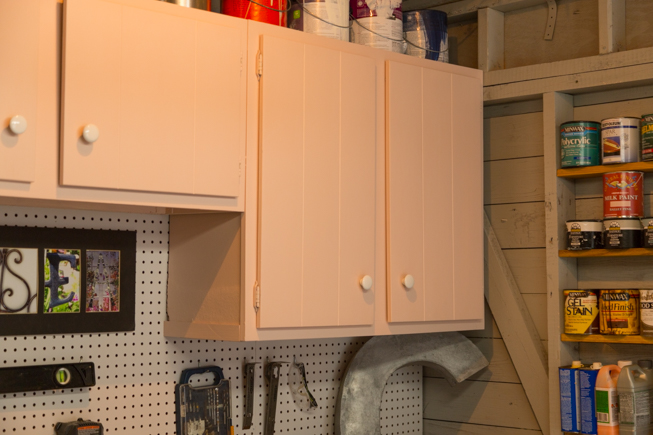
While I spray wash on the rafters, Chelsea preps some recycled cabinets for paint.
She uses General Finishes’ Water-Based Milk Paint in Ballet Pink — spraying it on is easy because we’re using Chelsea’s favorite tool: the HomeRight Finish Max HVLP Sprayer.

Install Pegboard and Cabinets
Chelsea wants pegboard under her wall cabinets. That wouldn’t be my first choice, but the one thing I like about pegboard is that you can see through the holes to mark cut-outs for outlets.
After I make cuts for the outlet, we tack the pegboard up. Then the screws we’re using to mount the cabinets will finish holding it in place.
Build a Work Bench
We build in a 2-by-4 frame to support the workbench, then add a recycled 1-by-12 shelf under the workbench for extra storage.
The top of the bench is plywood, which we notch around the studs on either end before we add a 1-by-2 band to the front.
While Chelsea paints the legs, I put the cabinets back together. Then we shift our focus to the work table.
Set Up the Work Table
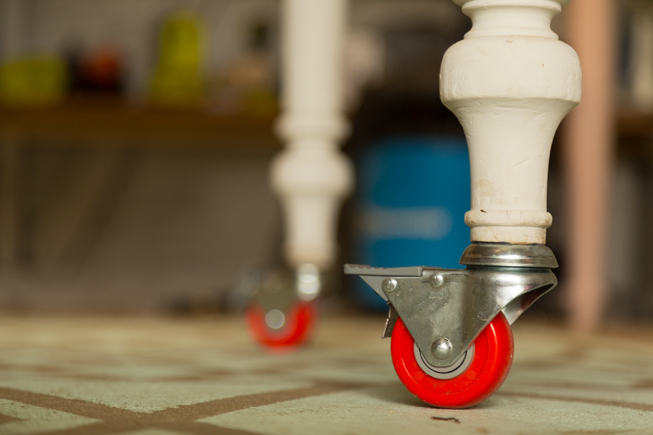
Chelsea will want to move things around from time to time, depending on the project she’s working on, so we’re adding casters from Woodcraft to make the work table mobile.
A wide, shallow hole will recess the nut on the caster. Then, a deeper, narrow hole will accept the bolt. After we dry fit it, we add some epoxy to secure the caster and thread it into position.
While the epoxy dries overnight, Chelsea stains her new workbench to match the aged heart pine shelf beneath it.
Install a Paper Roll
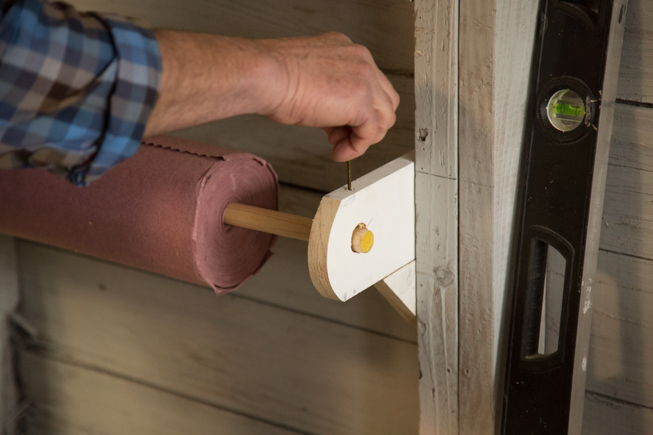
Chelsea wants to cover her work table during each messy project, so we’re adding a paper roll on a dowel rod between two 1-by-4’s. This will keep the work table clean and paint free.
Finally, we’re making every inch of space between the workshop’s open studs count. It’ll be used to install small shelves and store scrap wood.
Time to Clean!
Chelsea likes to work smarter, not harder, and she’s noticed it’s that time of year when she needs to ward off mold and mildew.
So she mixes five parts water to one part Wet and Forget Outdoor, puts it in a pump sprayer and sprays it on her home’s exterior, then she doesn’t have to worry about mold and mildew for up to a year.

Production Thoughts
Chelsea’s garage had become the family dumping ground since they weren’t parking their car there anymore. But the size and access made it ideal for a small workshop.
Now, the garage is lighter and brighter thanks to the wash we applied to all the walls and ceiling.
Painting the recycled cabinets pink made the queen very happy and provided plenty of storage for tools and materials in the workspace.
All of the details in this area set it up to be an efficient, yet comfortable workspace, and with all that extra storage space for tools, Chelsea was able to organize the other side of her garage as well.
